Scheduling a life around entertainment is a luxury that eludes most of us. I vaguely remember a time when I could count on being home, in front of the TV in time for my daily fix of Seinfeld reruns, a late-night helping of Futurama, or an hour’s worth of wilderness adventures on Survivorman.
Those days are but a distant memory.
Sure, I can watch favorite shows on DVD, but that’s sort of become pain, and there’s not enough room on any DVR for the amount of content I want. So, I took a different route: I created my own TV channel that plays what I want, when I want, and without commercials, discs, or weird DVR programming schedules. All it took was my Windows PC, some free software, and an unhealthy obsession for my favorite TV shows. Here’s how I did it.
The programs you’ll need
VLC Media Player: A fantastic free media player that can handle virtually any type of file
HandBrake: For ripping content off of your DVDs
Task Scheduler / Notepad: These come built-in on Windows. (If you’re still using XP, you’re out of luck. Also, why?)
Hardware is key
I’m fortunate in that one of my PCs is relatively close to the HDTV in my home office, so I was able to hook it up via HDMI cable and use it as an extra display. Your PC is going to be the heart of the entire project, and it needs to connect to your TV (or some other display) in order to play back your shows. Your computer monitor will work fine for this, but if you want to be able to use your main monitor for something other than TV playback, you’ll need an additional display of some sort.
Ripping your content
In order to set up your own all-about-you TV channel you’re going to need a good amount of content to populate it with. I have every season of Futurama, Seinfeld, and several other shows on DVD, which makes things pretty easy thanks to the wealth of quality DVD ripping software available.
One of the best is called Handbrake, and if you’re planning on using content from your DVD collection on your own custom TV station it’s a great free tool to use. You simply insert your disc into your computer’s DVD drive, choose it as the “source” within the Handbrake program, and select the video files you want to move to your computer. It can be somewhat tedious to have to go through all your discs and remove each episode one by one, but it’s worth it in the end.
Be sure to save your shows in labeled folders, as this will make it much easier to set up custom time slots for each program later on.
Setting up your playlists
Mike Wehner
Once you have at least 24 hours of content—the more the better, really—you can begin building your own TV station. Follow these steps:
-
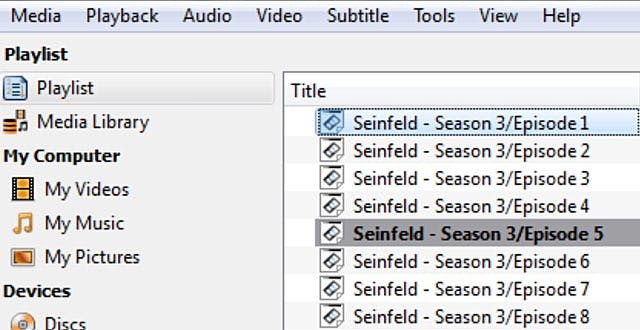
First, start up VLC and enter your Playlist menu by clicking “View>Playlist.”
-
Right click in the open space to the right of the menu bar and select “Add folder.”
-
Find one of the folders with your programming and click “Open.” The folder should now appear on the playlist.
-
Now click “Media>Save Playlist To File” and make sure the “Save as type” is set to XSPF.
Repeat these steps for every show you wish to add. I only used three for my first trial run, but you can add as many as you want.
What you just did was create the blocks of programming for your computer to grab from when the show’s time slot comes up. Yay!
Scheduling your channel
VLC is an extremely powerful program and it is also capable of handling scripts, which means there might be a simpler way of handling the scheduling. Unfortunately, a scheduling feature isn’t built-in and I’m no script guru, so I decided to let Windows do all the work for me. First we need to set up the files so that Windows will play nicely with them, which means creating batch files for each of the playlists you created.
-
Locate your playlist files wherever you happened to save them and note the drive path—for example “C:UsersOfficeVideosSeinfeld.xspf”—for all of the show playlists you’ve created.
-
Open your Notepad and paste or type the drive path for one of your playlists and put parenthesis around it.
-
Save the file, then open the folder it’s saved in.
-
You need to change the file type so that it won’t cause issues in Task Scheduler, so right click the file, select “Rename,” and change the file’s extension to “.bat” (If your file extensions aren’t visible, click the “Organize” tab on the top of the folder window, select “Folder and Search Options,” click the “View” tab and uncheck “Hide extensions for known file types”)
-
A warning will pop up asking if you’re sure you want to change the file to “.bat” so click “Yes.”
-
Repeat these steps for each of your playlist files.
We’re almost done. Now we just have to tell the computer when to play each show, and that will depend on your individual schedule. Personally, I like having Seinfeld playing right as I get done with work and then catching some Futurama later in the evening if I feel like it, so that’s how I scheduled my programming.
Once you’ve determined the time slots you want, it’s time for the last major step.
Mike Wehner
-
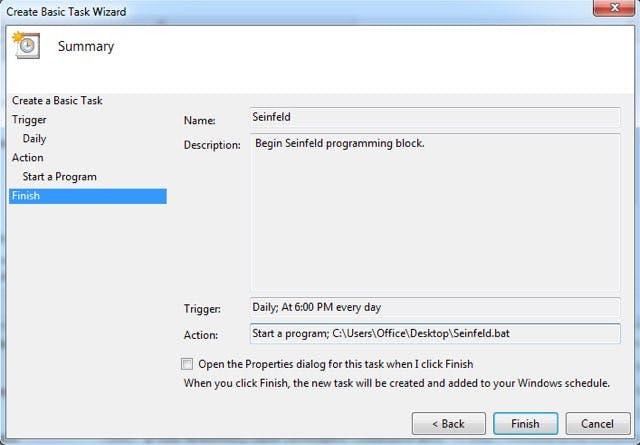
Open Task Scheduler and click on “Create Basic Task.”
-
Enter a name and description for the task, like “Futurama time slot.”
-
Click “Next” and select “Daily” if you want the schedule to repeat every day. You can get a lot more detailed and set up each day differently, but we’ll keep it simple for now.
-
Click “Next” and select the time you want that program to start. Assuming you have enough content in your playlist, it will continue to play until your next scheduled time slot.
-
Click “Next” and select “Start a program.”
-
Click “Next” and click the “Browse” button next to “Program/Script.”
-
Find the “.bat” file for the program you wish to run in the chosen time slot.
-
Click “Next” and then “Finish.”
Congrats! You’ve just set up your first piece of custom channel programming. Repeat these steps for each show you wish to add.
Each show will continue to play until your next scheduled slot, so for example, if you set up Show #1 to begin playing at 8am and Show #2 to begin at 3pm, Show #1 will play episodes for five hours before Show #2 begins. Remember, if you don’t have enough episodes of a show to cover its entire time slot it will simply stop playing, but this will not prevent the next show from starting at its intended time.
Final tweaks
There are a few last bits of cleanup we need to do to make sure the whole thing will run smoothly.
Mike Wehner
-
With VLC open, select “Tools>Preferences” and toggle fullscreen on under the video tab. This will ensure content starts playing on the full display when it starts.
-
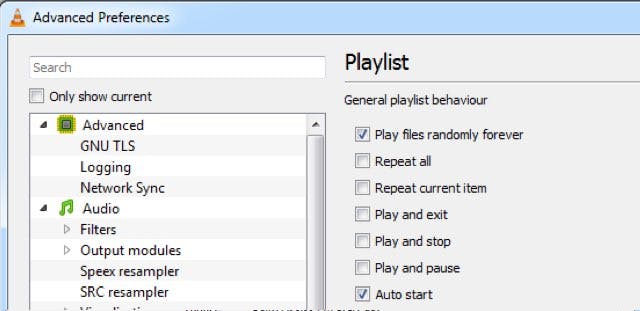
Also in the Preferences window, select “All” on the bottom right “Show settings” button and then click “Playlist” and toggle “Play files randomly forever” on. This will make VLC play each show’s episodes in a random order so you don’t catch the same ones day after day.
-
Locate your XSPF playlist files and make sure they are set to open with VLC as the default program. If not, you can change that by right clicking one of the files and then selecting “Choose default program” under the “Open with” menu selection.
You’re done! The beauty of this is that your computer is now going to play these shows whether you’re watching or not, so if you feel like it you can tune in, and if not it’s no big deal. Whenever you feel like watching your channel just switch your TV to the PC input and enjoy, just like you would with any other channel.
It’s worked fantastically for me and I love that it completely takes care of itself—no shuffling DVD discs, clearing space on my DVR, or dealing with randomly changing TV schedules. It’s my TV, just like I want it. No Comcast involved.
Photo via Gothopotam / Flickr (CC 2.0)

