With the premiere of The Hobbit: The Battle of the Five Armies, fans will have to say goodbye to the era of Peter Jackson in Middle-earth. Whether you’re sad to see this cinematic journey end or happy to get back to just enjoying J.R.R. Tolkien’s classics without the input of Hollywood, it seems like the perfect time to celebrate the ultimate heroes in this saga: the Hobbits.
Chris-Rachael Oseland, cookbook author and creator of the geek cooking website Kitchen Overlord, has just what you need to create a feast fit for any Shire table in An Unexpected Cookbook: The Unofficial Book of Hobbit Cookery. Oseland told the Daily Dot that as a second-generation geek with a Master's degree in history, she can’t remember a time when she wasn’t a fan of J.R.R. Tolkien's work.
“About a year and a half ago, I decided to have a Hobbit theme week on my cooking website, Kitchen Overlord," she said. "I fell deep down the research rabbit hole. When I came up for air, I started looking for Hobbit cookbooks and was genuinely surprised to find that there weren't any. I mean, c'mon! This is Tolkien! There are half a dozen Hunger Games cookbooks, but next to nothing for the Shire? This had to be corrected."
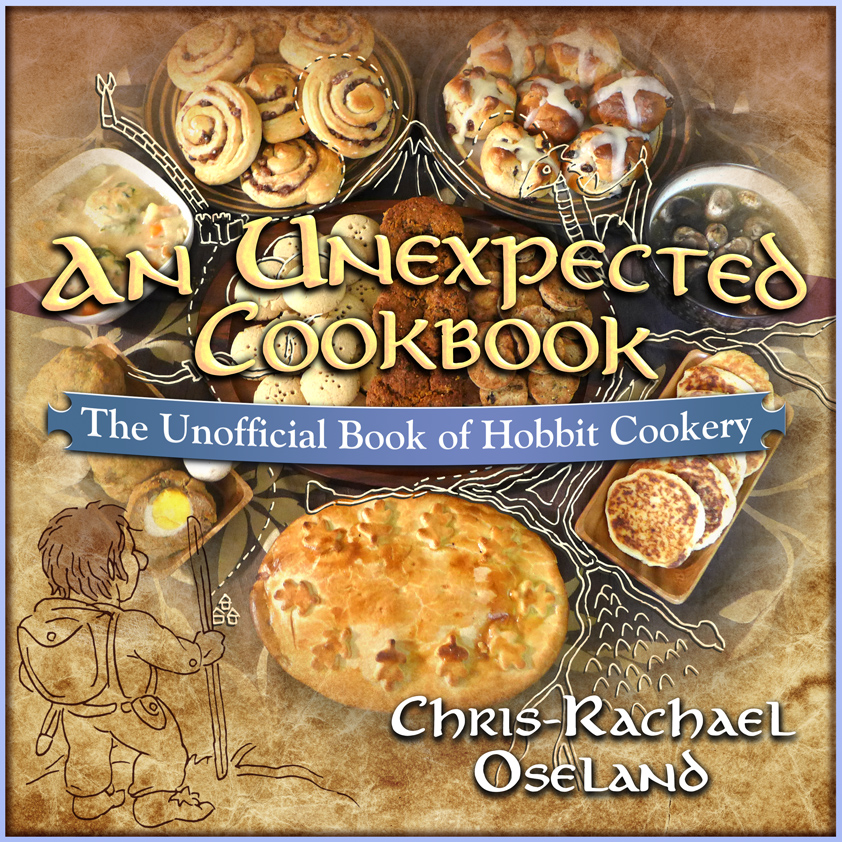
Cover image courtesy Chris-Rachael Oseland
Oseland is no stranger to writing geeky cookbooks. She’s the author of Dining With the Doctor: The Unauthorized Whovian Cookbook, SteamDrunks: 101 Steampunk Cocktails and Mixed Drinks, and Wood for Sheep: The Unauthorized Settlers Cookbook. She also successfully funded a Kickstarter campaign this summer for an upcoming illustrated geek cookbook.
The Hobbit cookbook includes recipes for all seven of the daily meals Hobbits enjoy: breakfast, second breakfast, elevenses, luncheon, afternoon tea, supper, and dinner. According to Oseland, the recipes are historically accurate and based on the time and region of the Shire. It was hard for her to decide on the final recipes to include in the book, as she ended up with hundreds of possibilities.
“First, I put them through the filters Tolkien placed on the Shire—no new world foods other than coffee, tobacco, or potatoes," Oseland explained. "All chocolate had to go, as did anything with squash or tomatoes, which were hugely popular in his day. I also had to be realistic about the differences between what people ate then versus what they eat now. People used to eat a lot more varieties of meat than we do now, as well as cuts of meat that most modern readers wouldn’t touch. I have beef, chicken, lamb, venison, and rabbit in the book. Today, that seems like a lot of diversity in meat, but late Victorian readers would wonder why there weren’t any recipes for game birds or squirrel or organ meats. I had to walk a line between keeping it authentic versus making it unusable or just gross to modern readers.”
If you want to try your hand at making a meal worthy of a Hobbit, here are four recipes from Oseland’s book.
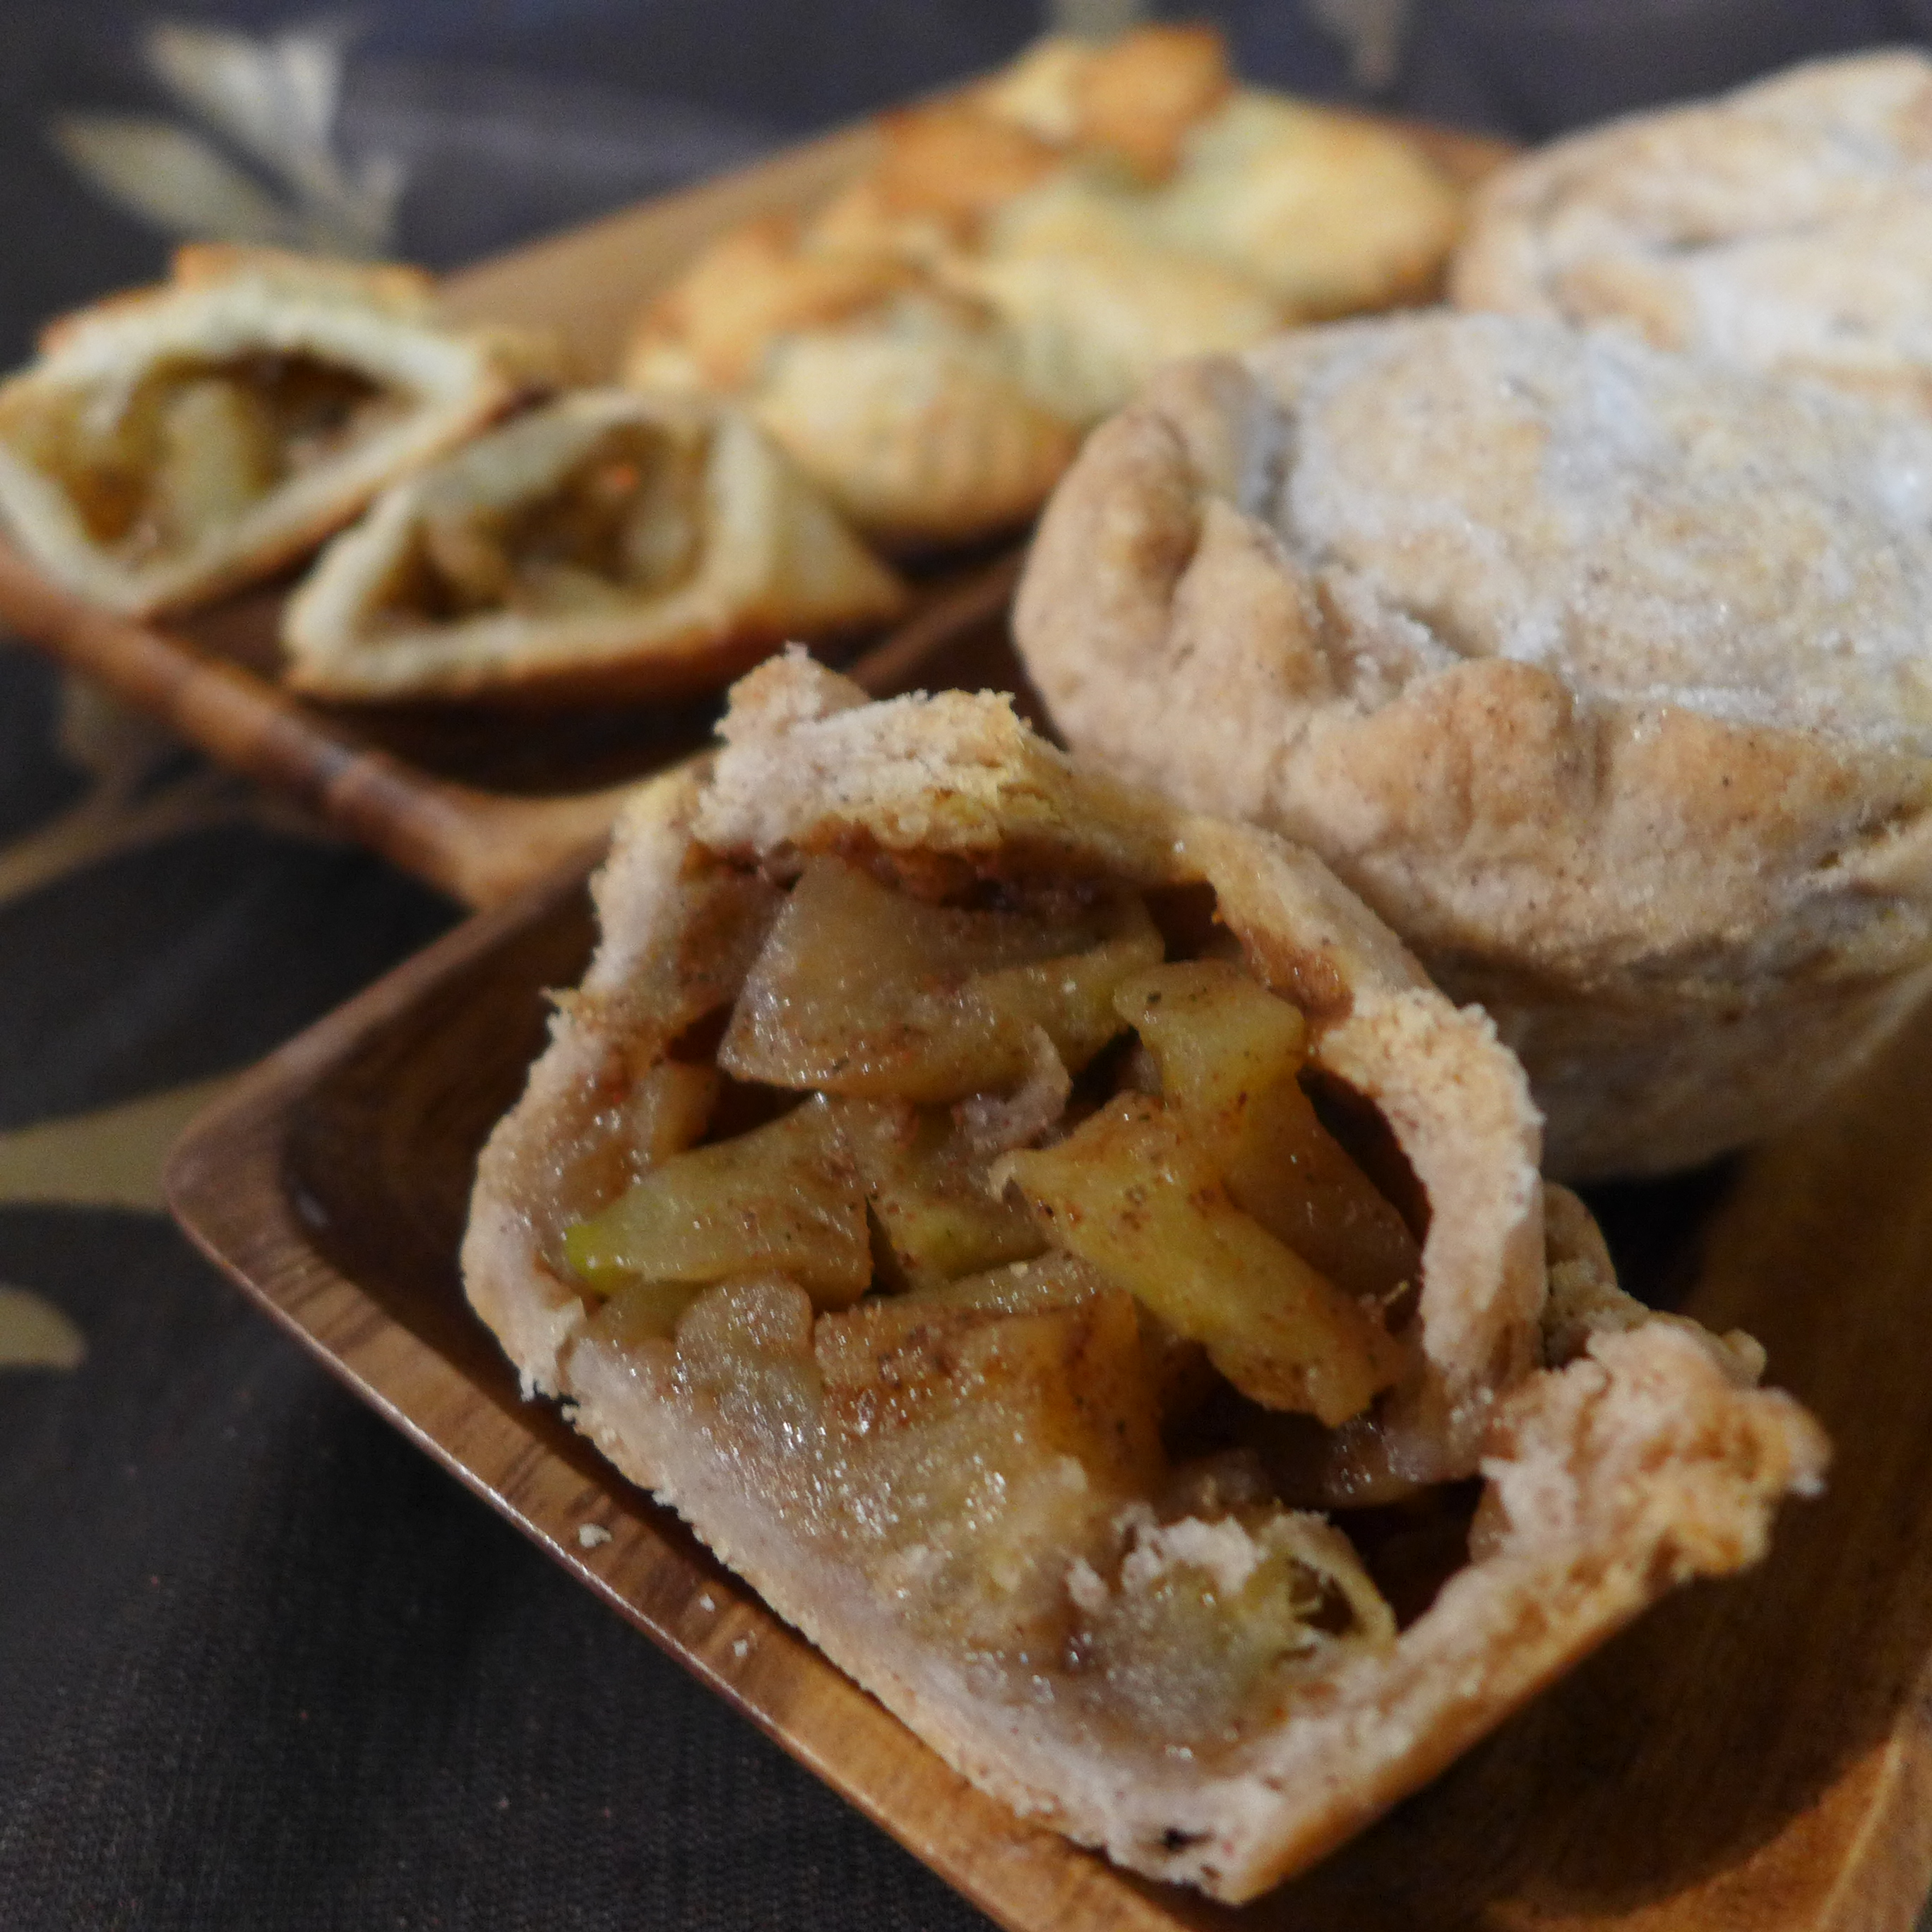
Second Breakfast: Apple Hand Pies Two Ways
These petite apple pies are good for more than second breakfast. If you make enough for leftovers, they can be enjoyed either as a hearty vegetarian breakfast or as a durable teatime treat capable of keeping their shape after bumping around in your pack for a few days.
Filling:
- 8 large, tart apples, peeled, cored, and diced small
- 1 c/200 g sugar
- 2 tsp cinnamon
- 1 tsp ginger
- 1⁄2 tsp nutmeg
- pinch ground cloves
- 3 tbsp butter, melted
- 2 tbsp honey
Crust:
- 1 batch short crust pastry plus optional additions:
- 1 tbsp sugar
- 1 tsp cinnamon
- extra sugar to dust the surface of the pies
Peel and core the tart green apples of your choice. Cut the apples into a small dice. The smaller you dice them, the more filling you can pack into each pie, so don’t be shy with the knife.
Mix the sugar, cinnamon, ginger, nutmeg, and a pinch of cloves in a large mixing bowl. Once they’re all playing nicely together, dump the apples on top. Toss them in the spice mix until every piece of apple is coated. Now drizzle the melted butter and honey on top. Toss the apples a few more times to get the tasty fat and liquid sugar on as many pieces as possible.
Let the apple flavors mingle while you make the crust.
You can just mix up one large batch of short crust pastry and stuff 1/3 with mushroom filling, 1/3 with pork pie filling, and 1/3 with apple filling. However, if you’re only making the apple pies, go ahead and sweeten the crust a little. Add 1 tbsp sugar and 1 tsp cinnamon to the flour. Once all the dry ingredients are mixed together, add the butter and water just like in the original recipe. This gives the apple pies a hint of sweetness and a nice added aroma, but it’s not strictly necessary.
Once your filling and crust are ready, preheat your oven to 375F/190C.
You can now make your pies in two shapes. Either way, start by sprinkling flour on a clean surface and rolling the dough out to 1⁄4 inch/3 mm thickness. Don’t go much thinner or they’ll be prone to falling apart after one bite.
To make a large, cupcake-sized hand pies, start by generously greasing a muffin tin with butter. Remember, this isn’t health food. You want the pies to slide right out with ease while also gaining a little extra crispy flavor.
Use a cookie cutter about 2 inches/5 cm bigger around than your muffin pan wells. Press the large round piece into a well. Make sure a little bit hangs over the top.
Poke a couple vent holes in the bottom then spoon apple filling up to the top of your muffin wells.
Cut out a second circle of dough just a smidge narrower than the top of your muffin wells. Lay it on top of the filling. Pinch the overhanging filling around the top crust. You’ve now successfully enclosed your pies.
Poke a few vent holes in the top of the crust. Feel free to sprinkle it with a little extra cinnamon and sugar to give it a nice crunch.
Bake the cupcake-sized hand pies at 375F/190C for 45-50 min or until golden brown.
If you prefer the bite-sized teatime pies, simply cut out a flat disc of dough with a 2 inch/5 cm cutter. Pile a heaping tbsp of filling in the middle, fold the dough in half, and pinch the edges closed with a fork. Feel free to decorate the tops with shapes cut out from extra dough.
Bake the smaller, folded pies at 375F/190C for 20-25 minutes, or until golden brown.
The flavor is equally good either way. Use whatever shape fits your overall meal strategy. After all, going on an adventure is no reason to be uncivilized.
Vegan variation: The larger pie crusts don’t hold up well when oil is substituted for butter, so you’re best off sticking to the smaller, folded ones.
Replace the filling’s butter with coconut oil or vegan margarine. Increase the cinnamon by 1 tsp and add 1 tsp of salt to make up
for the flavor difference. The pastry won’t bake up into as deep a golden brown, but it’ll still be perfectly tasty.
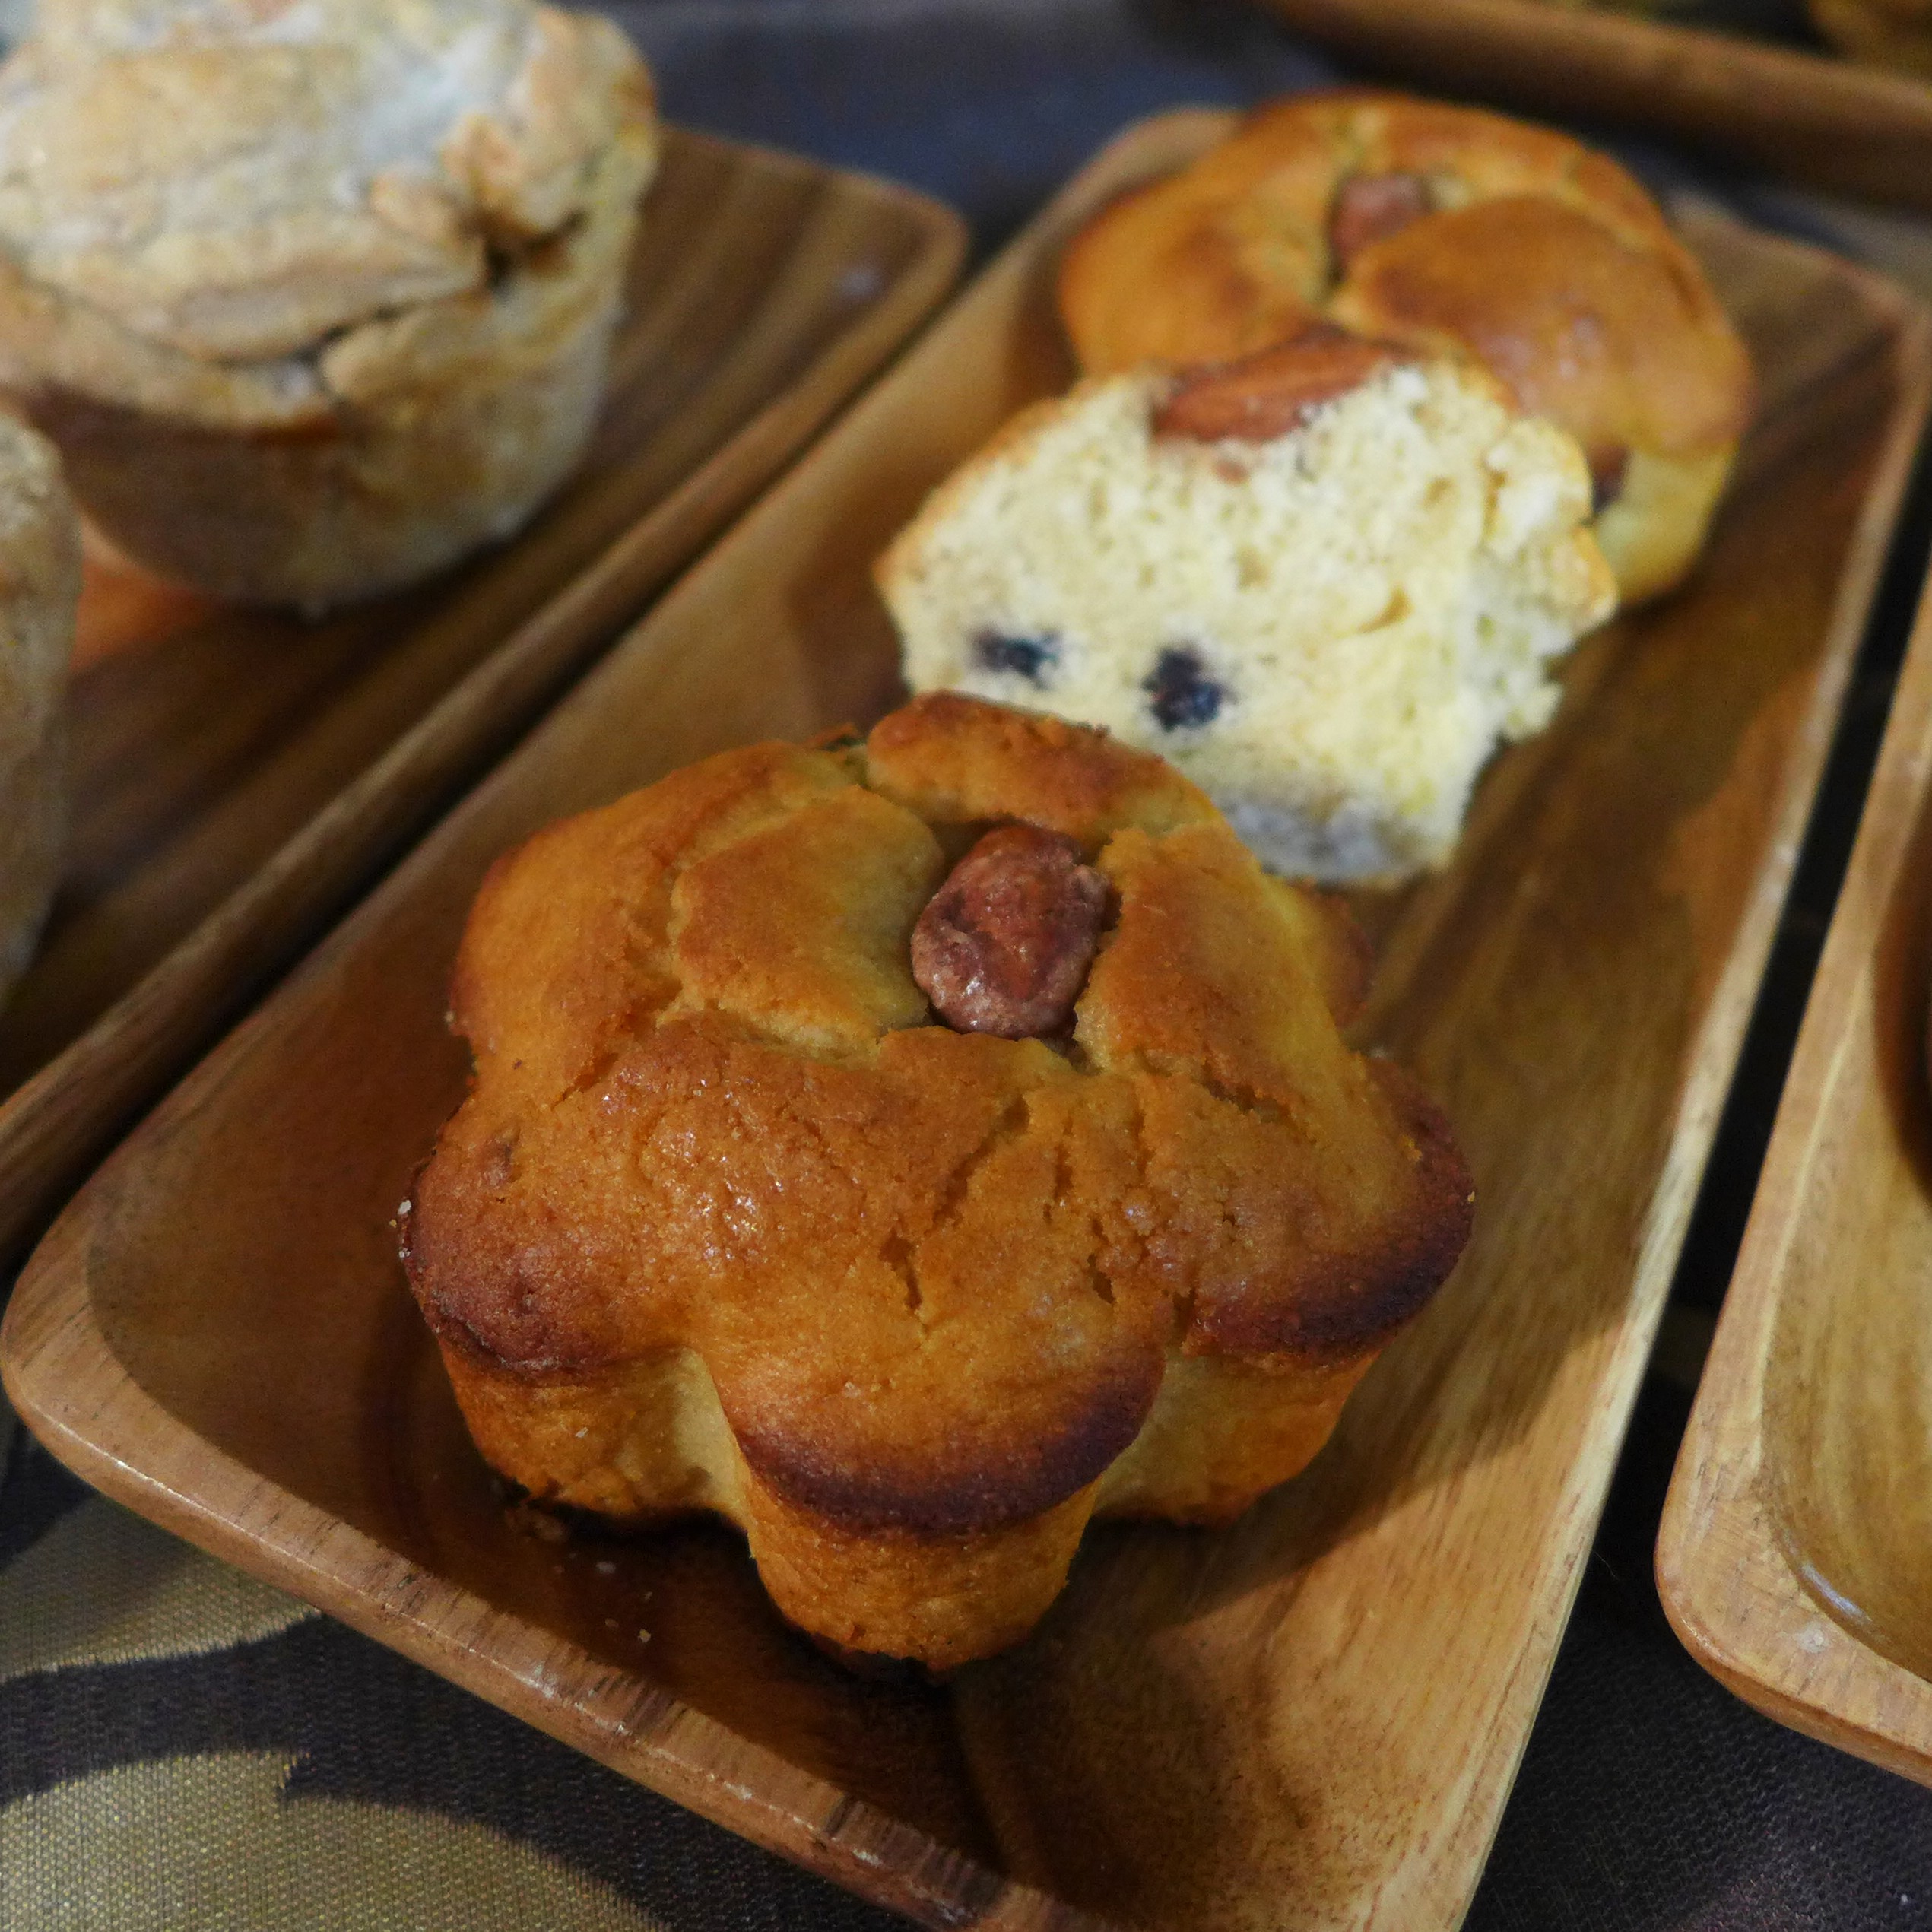
Elevenses: Honey Cakes
Since Tolkien said the Shire was based on nostalgic memories of his childhood, these honey cakes are inspired by late Victorian
recipes for twice baked cakes. The second baking hardens the honey glaze in place while firming up the crust, giving them a moist, tender interior and a sweet, crunchy exterior.
- 1 3⁄4 c/220 g all-purpose flour
- 1 1⁄2 tsp baking powder
- 1⁄2 tsp salt
- 1⁄2 c/115 g room temperature butter
- 1⁄2 c/85 g dried blueberries or currants
- Zest of 1 lemon
- 3⁄4 c/200 ml whole milk
- 1 egg3⁄4 c/255 g honey + 1⁄4 c/85 g honey, reserved
- 10-12 candied almonds for decoration
Pre-heat your oven to 400F/205C. While the oven heats up, whisk together your flour, baking powder, and salt.
Mix the butter into the flour blend until you achieve a crumbly meal. Once it looks like gravel, add the lemon zest and blueberries or currants. Make sure it’s all well blended.
In another bowl, beat the milk, egg, and 3/4 c honey until you get a nice, sloppy mess. Pour that into the crumbly flour blend and mix until the batter is just barely free of lumps. No need to over work it or else you’ll burst the blueberries.
Scoop about 1⁄3 c of the batter into heavily buttered muffin pan wells. You want to use a generous amount of butter instead of liners in order to achieve a nice, crispy crust.
For the first baking, leave them in a 400F/205C oven for 12 minutes. They'll be ready to take out of the oven when the tops feel solid, but a toothpick stuck in the center comes out a little sticky. If you used enough butter, the cakes should slide right out of the muffin tin. Arrange them 1 inch/2.5 cm apart on a greased baking sheet.
Gently press a candied almond (or a plain one if you prefer) into the middle of each honey cake then generously drizzle the rest of your honey on top of the cakes. It helps to heat your honey in the microwave for 15-20 seconds to thin it out. Use enough to coat the top and let it drip down the sides. This creates a nice crispy glaze on your honey cakes. Once they’re decorated with an almond crown and drizzled in sweetness, let the honey cakes sit for at least 5 minutes so the honey can soak in.
Put the baking sheet back in the oven for 10-12 minutes, or until the tops are a deep golden honey brown.
While they’re still perfectly edible days later, if you find yourself the host of an unexpected party, these honey cakes are quick to make and taste amazing fresh from the oven with a bit of jam and clotted cream. They’re even better the next day, when the crust is nice and crispy and the interior still soft and moist.
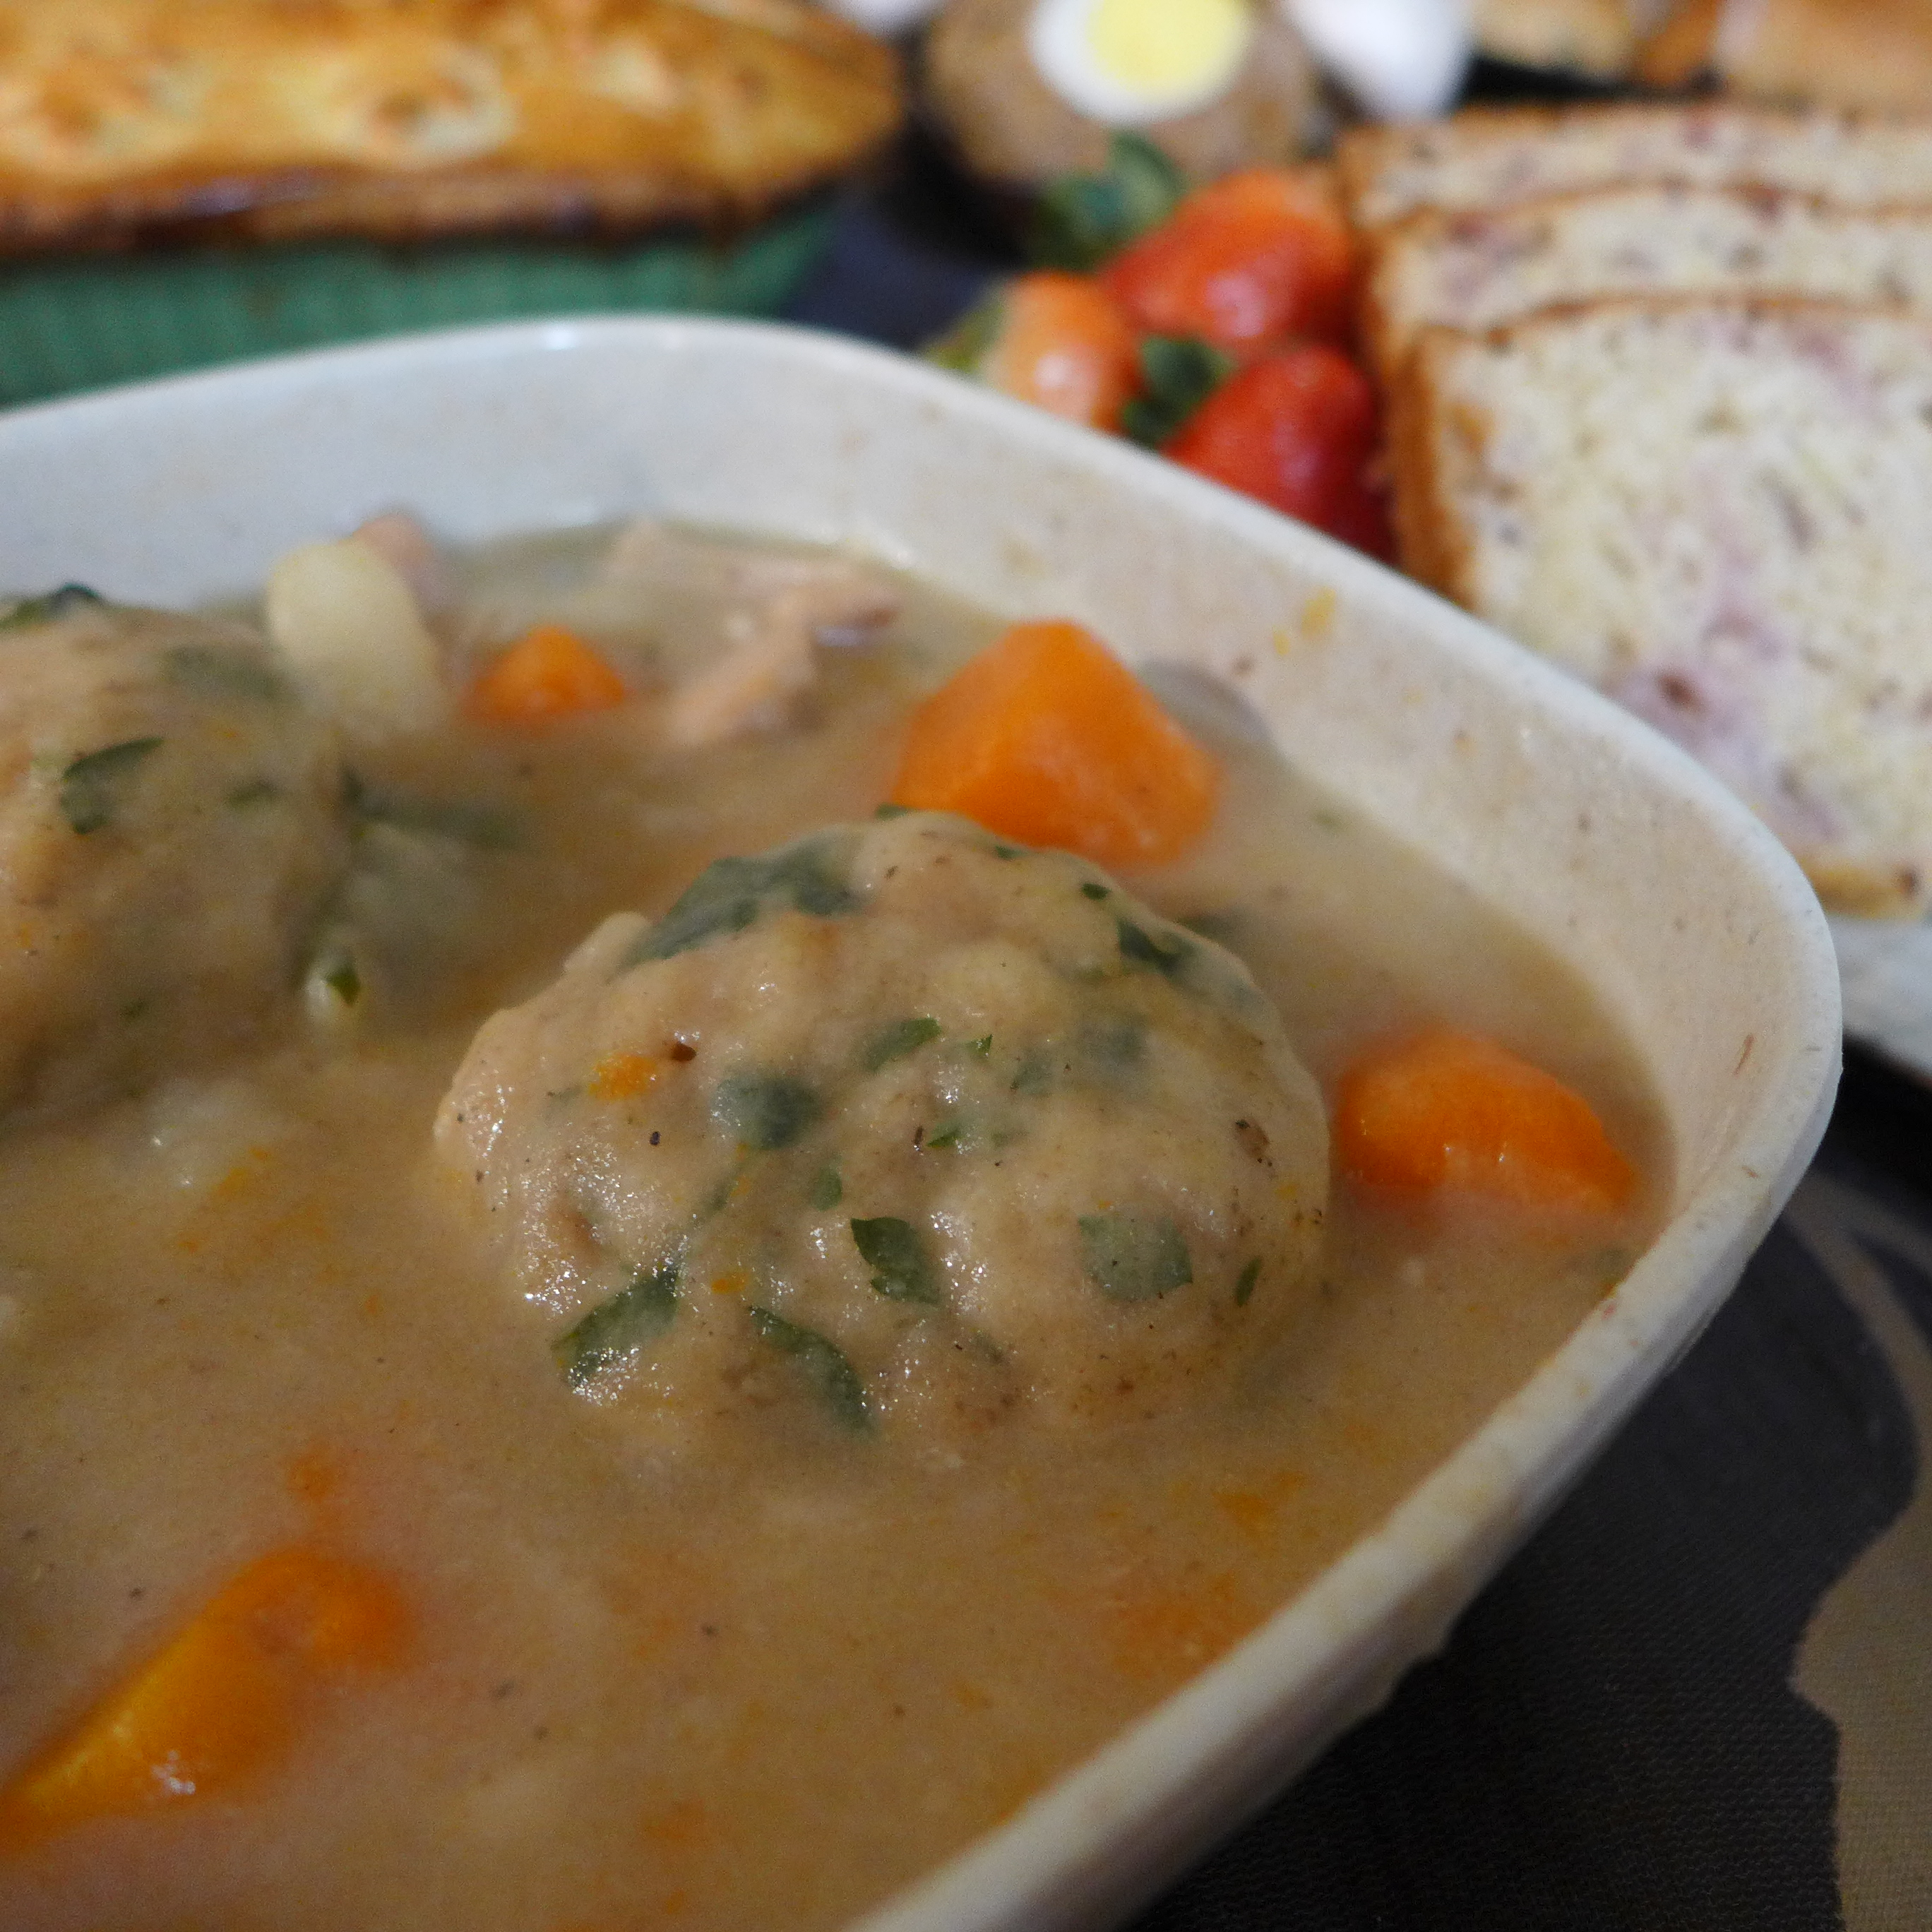
Luncheon: Stewed Hare with Root Vegetables and Herb Dumplings
Until very recently, rabbits were a common source of protein. Before refrigeration, their small size made one rabbit the perfect amount
of meat for a single family’s meal with no worry about waste or spoilage. It wasn’t uncommon for country families to keep chickens
and rabbits as both pets and food. Their wild cousins were incredible pests, and many a farmer who’d had his crops eaten away by the
fluffy menace felt vindicated sitting down to a nice supper of stewed hare.
If you’ve never tried rabbit, it’s a mild, easygoing meat that pairs perfectly with English herbs. If your large local grocery store stocks
bison or goat, odds are good they also occasionally stock rabbit. Some smaller grocers also stock a few frozen rabbits, usually in
bottom drawers away from eye level.
Stew:
- 1 tbsp butter or lard
- 2 onions, diced
- 1 medium rabbit, skinned and quartered
- 2 bay leaves
- 1 tsp fresh ground black pepper
- 2 tsp coarse salt
- 1 tsp dried tarragon
- 1 tsp dried thyme
- 1⁄2 tsp dried basil
- 5 c/1 liter water
- 4 large carrots, peeled and cut into large chunks
- 4 medium potatoes, peeled and cut into large chunks
- 1 large turnip, peeled and cut into large chunks
Dumplings:
- 1 c/140 g all purpose flour
- 1⁄2 c/120 g cold butter
- 1⁄4 c/20 g fresh parsley, chopped
- 2 tsp baking powder
- 1⁄2 tsp coarse salt
- 1⁄2 tsp black pepper
- cold water
Start by peeling your carrots, potatoes, and turnip. Cut the root veggies into equal sized large chunks of around 2 inches/5 cm.
It’s time to get out your trusty Dutch oven again. If you don’t have a Dutch oven, use your heartiest stock pot.
Melt 1 tbsp butter or lard over a medium-high heat. Once the fat is a liquid, carefully brown your rabbit quarters. Use a pair of tongs to take them out of the pot and add the chopped onion in their place. Cook the onion until it barely starts to brown, no more than 3-4 minutes. Add the salt, pepper, bay leaves, tarragon, thyme, and basil. Mix them in with the onions and keep cooking for another minute.
Add all the water. Give it all a good, hearty stir. Since you’re not using broth, you really want the herbs mixed in well. Now return your rabbit pieces to the pot and put a lid on it. Turn the heat down to medium-low. You want to get a nice simmer going. Don’t let it come to a heavy boil. Let the hare and herbs simmer for 1 1⁄2 hours, stirring once every 15 minutes or so.
After an hour and a half, add the carrots, potatoes, and turnips. Give it all another good, hearty stir and put the lid back on. Let it keep cooking for another half hour.
Meanwhile, prepare your dumplings. Historically, really decadent dumplings would be made with beef suet, which is a flavorful liver fat. If you have a really good butcher, he can get you some, but few commercial grocers stock it. Instead, we’re substituting the cheaper, more commonly available but still delicious fat of butter.
Mix the flour, salt, pepper, parsley, and baking powder. Now cut the butter into small pieces and add it in. Use your fingers to crumble the butter into the flour mix. Once you’ve made something akin to parsley flavored gravel, add water, 1 tsp at a time, until you’ve got just enough to turn the gravel into a soft dough. Don’t knead, squeeze, or overwork the dough. If you do, you’ll get tough, chewy dumplings instead of soft, fluffy ones. Rip the dough into 8 smaller pieces.
Give your gently simmering stew one more hefty stir. Now carefully drop the 8 dumplings on top of the liquid. Don’t fuss with it. Just drop in a dumpling and move along. It doesn’t need to be perfect. Get them into the pot as quickly as possible and slap a lid on it.
Clamp the lid down tightly and leave it alone for 20 minutes. Do not raise the lid. If you let the steam escape, you’ll ruin your dumplings.
After 20 minutes, take the lid off and admire your handiwork. Use a slotted spoon to carefully lift the dumplings out of the broth. Now, because you’re a nice person, fish out the bones. If your broth is too thin, you can boil it uncovered for a few minutes to thicken it up.
Serve each person one hearty scoop of rabbit and veggies with two dumplings. Pour a little extra broth on top to keep it nice and creamy.
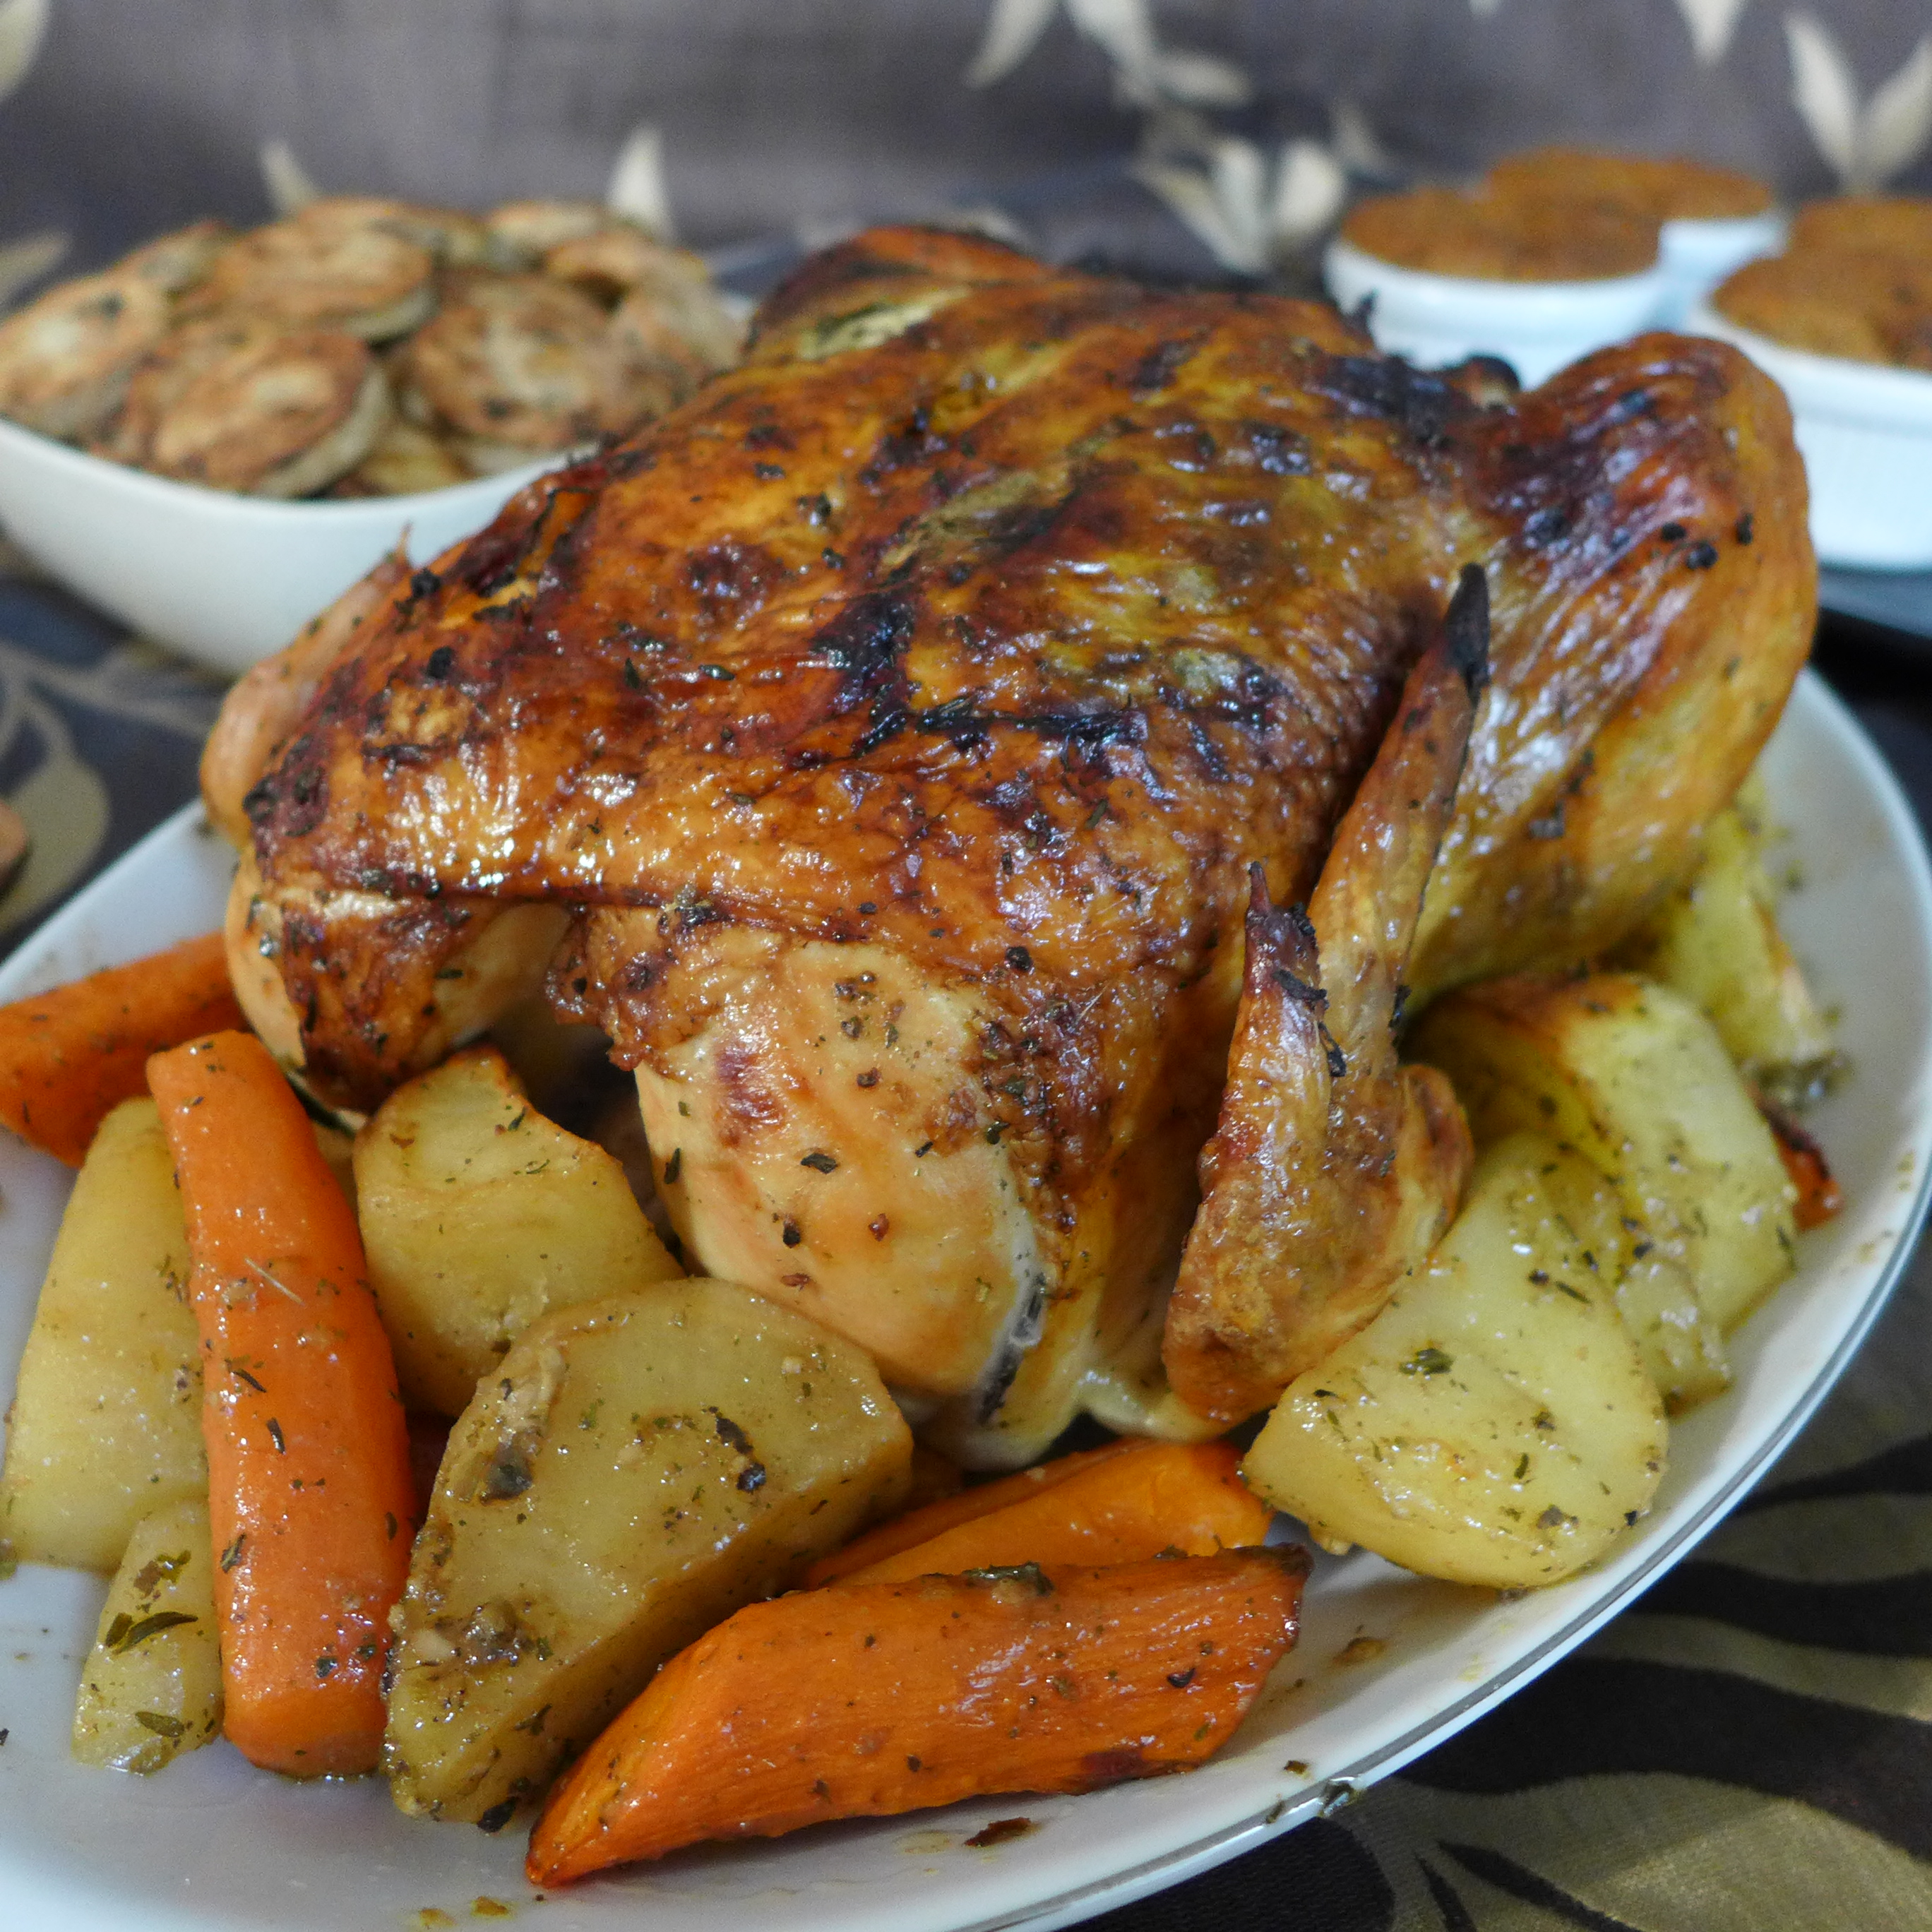
Dinner: Sunday Roast Chicken
A single roast chicken could feed a small family for days. On Sunday night, the parents might have a thigh each while the kids got a
drumstick. The next day, everyone would have slices of cold chicken breast with plenty of pickles, mustard, and a chunk of bread.
Once all the meat was gone, the rest of the carcass would go into a pot to be turned into broth for soup.
- 1 whole roasting chicken
- 1⁄2 c/115 g room temperature butter
- 5 tbsp fresh garden herbs, minced
- 5 cloves garlic, minced
- 2 tsp coarse salt
- 1 whole head of garlic
- 2 large sprigs of rosemary
- 2 1⁄4 lbs/1 kg carrots, peeled and cut into 2 inch/5 cm chunks
- 2 1⁄4 lbs/1 kg potatoes, peeled and cut into 2 inch/5 cm chunks
Preheat your oven to 475F/245C.
While your oven heats up, mince five tbsps of your favorite fresh garden herbs. If you’re not sure what to use, try 2 tbsp rosemary and 1 each of basil, thyme, and marjoram. Don’t let that limit you, though. Use whatever grows in your corner of the Shire. If herbs are out of season, you can also substitute 2 1⁄2 tbsp of any pre-mixed herb blend.
Mix the minced herbs with the butter, minced garlic, and coarse salt.
Once you’ve achieved a nice, chunky herb butter, set it aside. Now peel your carrots and potatoes. You can also add other root vegetables common to the Shire such as turnips or rutabaga (also known as swede). Just make sure they’re peeled and cut into 2 inch/5 cm chunks so all the vegetables will cook evenly.
Spread an even layer of peeled, cubed vegetables in the bottom of a roasting pan.
Now it’s time to deal with the bird itself.
Thoroughly rinse the interior and exterior of your chicken in cold water. Remove any gizzards or other internal organs. Use paper towels to pat it dry. A dry chicken bathed in butter will produce a nice, crispy skin. A wet chicken, on the other hand, will end up with limp, soggy skin. Do yourself a favor and dry it up.
Cut your whole head of garlic in half horizontally. Rub it all over the interior of the bird. This not only adds flavor, but also has a mild antiseptic effect. This combination of flavor and sanitation is why people commonly rub cut lemons on the interior of a chicken then leave the citrus in place while it cooks. However, since citrus would’ve been extremely expensive in the sort of rural English village that inspired the Shire, they would’ve saved lemons for recipes where they played a starring role. (If you’re not a stickler for period accuracy, feel free to cut a lemon in half, spike it with a couple of cloves, and rub that around the interior as well.)
Gently bruise your rosemary sprigs and stuff them in the cavity along with the two halves of the garlic. Tie the legs together to keep the stuffing in place.
Use your fingers to loosen the skin. Gently slide a tbsp of herb butter under as much skin as possible. Rub another two tbsps of herb butter over the entire bird. Try to coat it as thoroughly as possible. Dot the vegetables with the remaining butter.
Snuggle the bird into its vegetable nest. Roast it at 475F/245C for 25 minutes. Use a slotted spoon to carefully turn the vegetables surrounding the bird. You want to make sure all of them get a little bit of butter and/or drippings. Return the bird to the oven and continue roasting at 400F/205C for another 45 minutes or until a meat thermometer plunged into the thickest part of the thigh registers 160F/162C internal temperature.
Check on the bird around the 30-minute mark. If the skin is getting too crispy, tent some aluminum foil on top to keep it from burning.
When you pull your chicken out of the oven, let it rest for 20 minutes before carving. While it’s resting, give the vegetables a good stir to ensure they’re coated in butter and drippings. If they’re cooked through, turn off the oven and leave them inside it to keep warm. If they’re still a little raw in the middle, keep cooking for another 10-15 minutes at 400F/205C while the chicken rests.
You can purchase a copy of An Unexpected Cookbook: The Unofficial Book of Hobbit Cookery for $24.95 on Etsy or Amazon.
All recipes and photos from An Unexpected Cookbook: The Unofficial Book of Hobbit Cookery by Chris-Rachael Oseland. Reprinted with the author's permission.