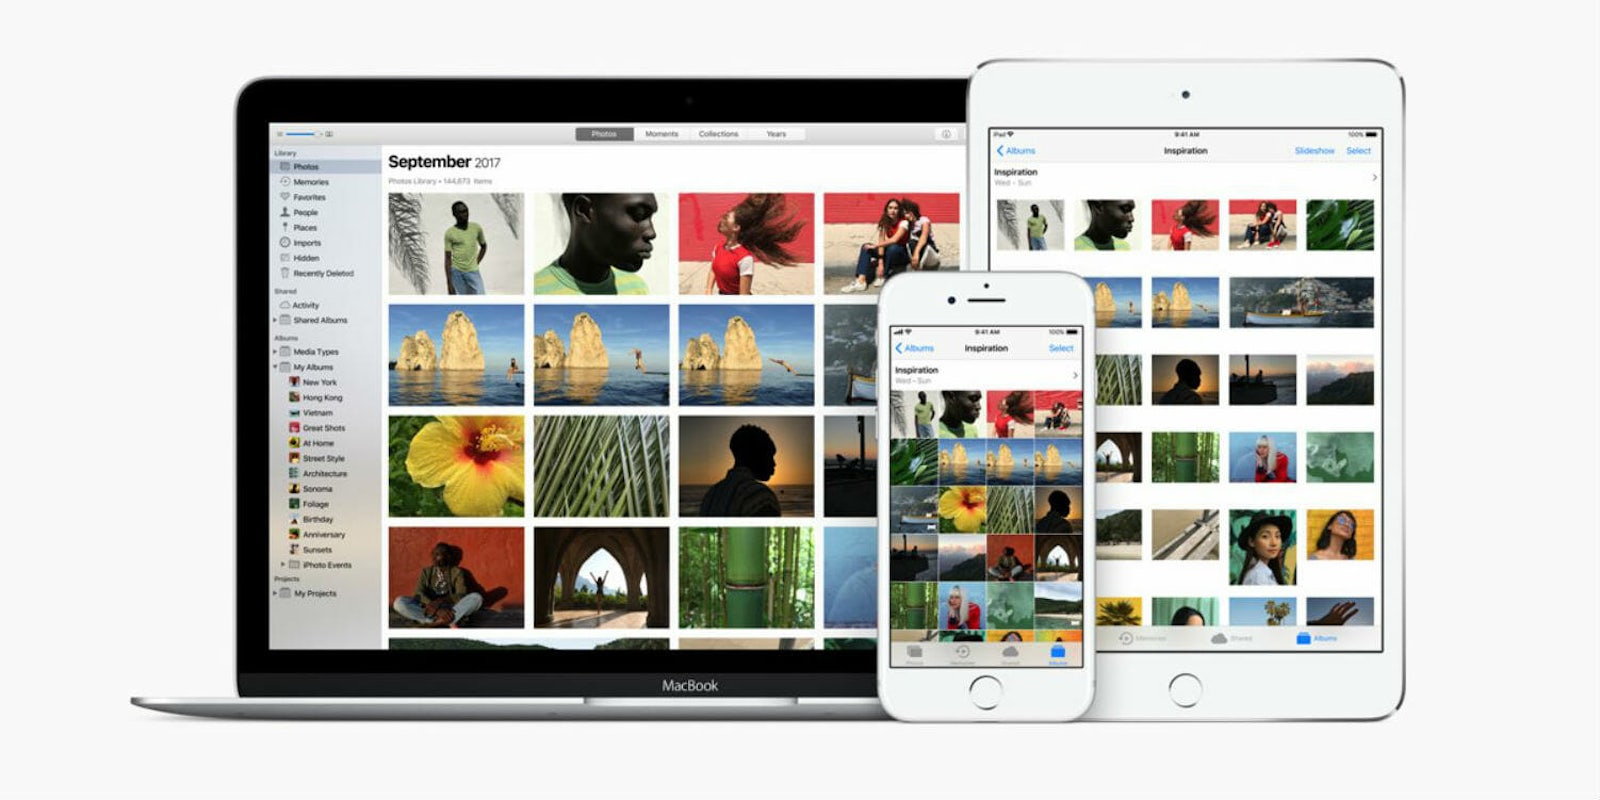
The cloud can be a useful tool for backing up photos and videos in case something happens to your device, but it’s always a good idea to store your files locally, too.
There are several reasons why you’d want to keep a “physical” copy of your photos and videos. First, since they aren’t getting pushed to a remote server, stored images can only be seen by those who have access to your devices. Downloading images onto your laptop or phone also means you can delete files from iCloud should you run out of storage. And for those few centrists who flop-flip between iOS and Android, having downloaded images takes the stress out of switching operating systems.
Whatever the reason, downloading photos from Apple’s iCloud is a simple process once you know what you’re looking for. Here’s how to download photos from iCloud onto all of your devices.
How to download photos from iCloud on iPhone and iPad
All the photos you take with your iPhone camera—even if iCloud is enabled—get automatically downloaded to the device. Additionally, every photo uploaded to iCloud from another device, be it a Mac, iPod Touch, or Windows PC, automatically syncs with your phone. So, if you want to get iCloud photos onto your iPhone, you simply need to enable iCloud in the setting menu.

Uploading photos to iCloud on macOS and Windows takes little effort. On macOS and Windows, the easiest way is to use www.iCloud.com. Just log in, select the Photos icon and press on the upload symbol in the upper-right corner (a cloud with an arrow pointing up). After you’ve uploaded photos to iCloud from your computer, you’ll be able to view them on your iPhone like you would any other image. Note: Photos are displayed chronologically, so you might need to do some searching.
There are some limitations to downloading images onto your phone. Once your iPhone gets low on storage space, full-resolution photos and videos uploaded to iCloud are automatically replaced with compressed replacements. The full-resolution images are stored in iCloud. Fortunately, there’s a simple way to keep the originals in the cloud and on your phone.
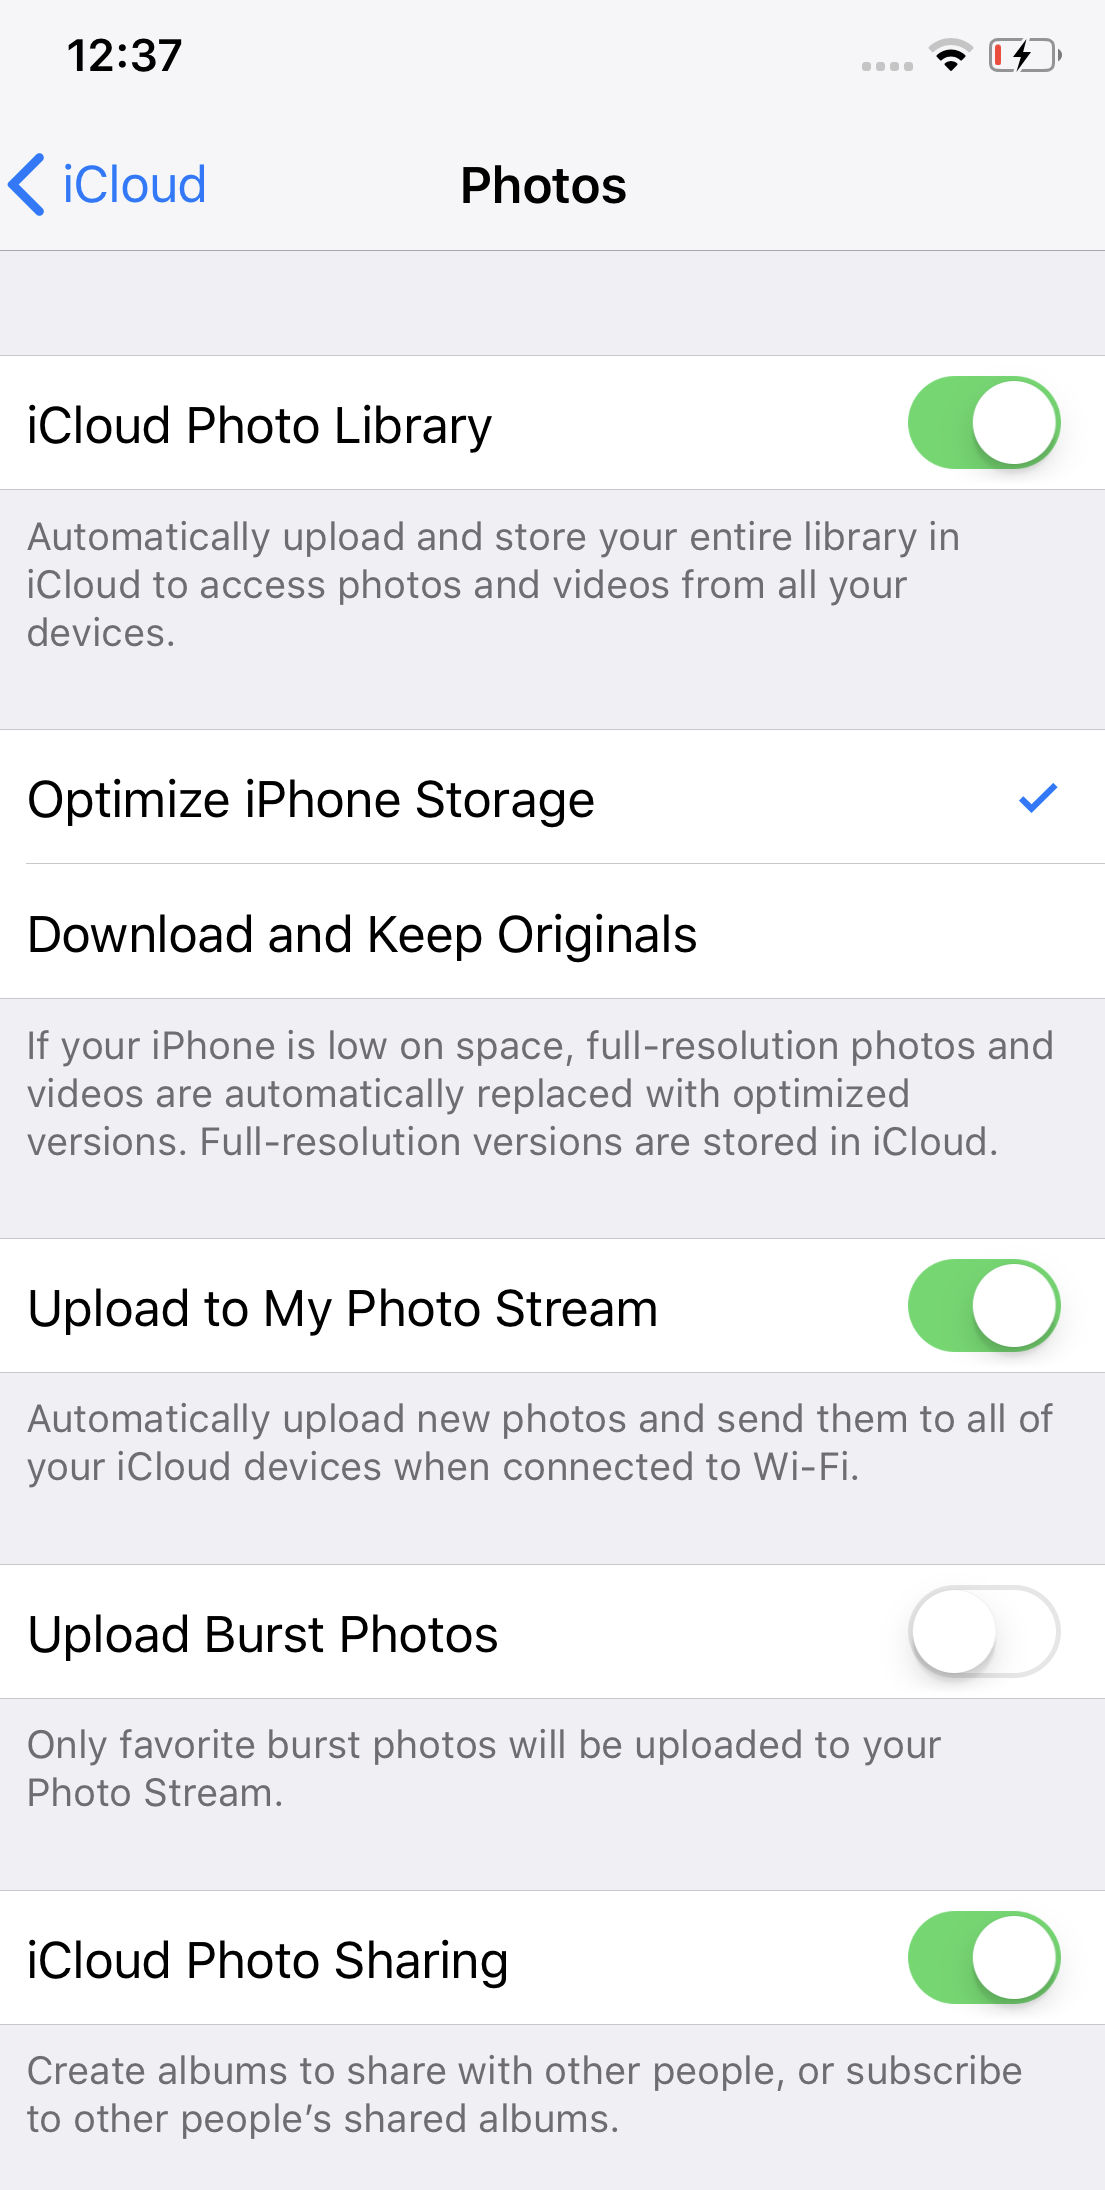
Select the settings (gear icon) from your phone’s home screen and press on your name at the top. From there, tap “iCloud.” This will take you to the iCloud manager. If you select “Photos” and enable “Download and Keep Originals,” your iPhone will no longer replace full-resolution downloads with smaller, compressed images.
READ MORE:
- The simple trick to using screen recording in iOS 11
- The best iPhone X cases for every budget
- How to access iCloud on iPhone, Mac, and Windows
How to download photos from iCloud on Mac
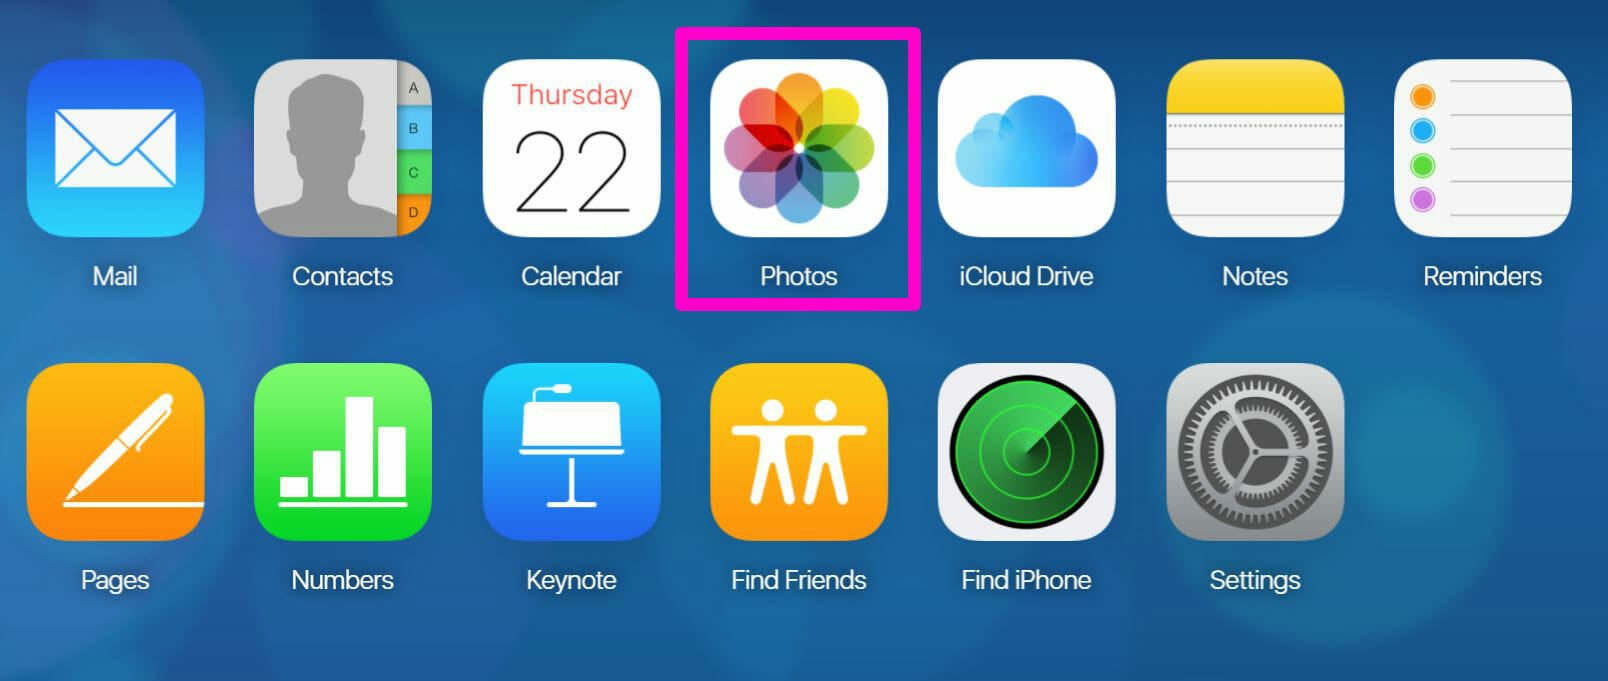
It’s very easy to download photos on your macOS computers from iCloud. Again, the trick here is to use Apple’s www.iCloud.com website. It’s clean, simple, and has all the basic tools you need to view, transfer, and edit images.
As a refresher, once you enter the site, you’ll be asked to log in. After doing so, press the Photos icon (a colorful flower?). Here, you’ll see every photo you’ve uploaded to an iCloud-enabled device.
Unless you want to download all your photos onto your Mac, we recommend you create a new folder and drag over individual images. It will make this process easier and help keep your photos organized. To create a new album, press on the + sign in the top right corner of your screen and select “New Album” from the drop-down. Name it, press OK, and voila! You’re ready to go.
Now you need to open the folder your desired photos are in, select them, and either drag them to your new album on the sidebar or press the + symbol again and choose the new album from the drop-down menu.

Obviously, doing this one image at a time could take a while. You can cut down that time by holding command and pressing each image individually to select multiple. Unfortunately, you can no longer press “Command + A” to highlight all images.
Once you’ve moved them to the new album, press the cloud with the arrow pointing down from the top right corner of the page (if you hover over it, it will say “download selected items”). After you press it, your photos will download onto your machine.
How to download photos from iCloud on Windows
If you just want to download a few photos or videos at a time onto your Windows PC, your best bet is to also use www.icloud.com. You will use the same steps outlined in the Mac section above.
First, log in with your Apple ID. Then press the Photos icon. From here, select the photos you want to download by clicking on them once. Again, if you want to download multiple photos at once, hold the “Ctrl” button as you make your selections.
READ MORE:
- How to repost on Instagram
- The secret trick to downloading full-resolution Instagram photos
- Who has the most followers on Instagram?
Unfortunately, Apple no longer lets you hold “Shift” to select a group of images or an entire album. After you’ve chosen the photos you want to download, either put them in a new folder by pressing the + icon or download them right away by selecting the cloud with a downward arrow icon.
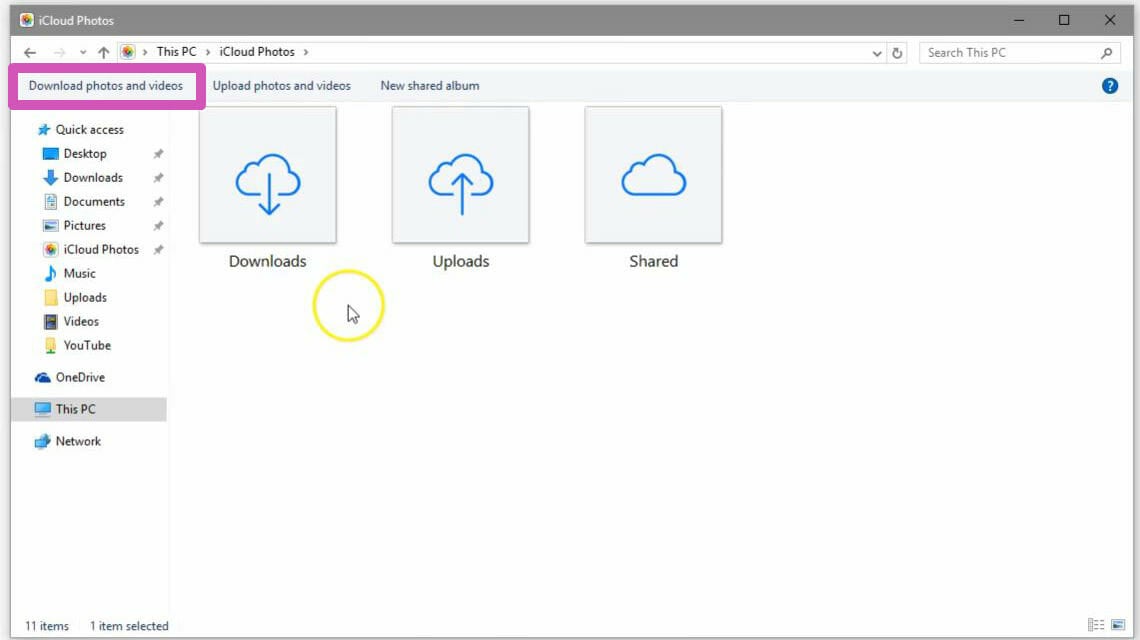
The second way to download iCloud images onto your Windows PC is to use the trusty File Explorer. This method is easier for downloading all of your images at once.
After you’ve set up iCloud with the Windows-specific program, open File Explorer by either searching for it or selecting the folder icon from your desktop. Once it’s open, you’ll see iCloud Photo under PC or the Quick Access menu on the left sidebar. Double-click on iCloud Photos.
On the top left corner, select the “Download photos and videos” option (see image above). Next, press “All” if you want to download everything in iCloud Photos. Then press “downloads” and double-click the “Downloads” icon from File Explorer. If you don’t see anything right away, don’t worry. Your computer will populate the folder with downloaded photos as they load.
