When you want to stream what’s happening in your world at this moment, there’s arguably no easier way to do it then with Instagram Live.
Instagram first introduced the ability to share live video in late 2016. Since then, it’s updated Instagram Live with additional features, such as the option to split the screen and go live with a friend.
Using Instagram Live is relatively straightforward, but with a little extra know-how, you can make your livestream engaging, high-quality, and worth your followers’ time. Here’s everything you need to know about how to go live on Instagram.
How to use Instagram Live
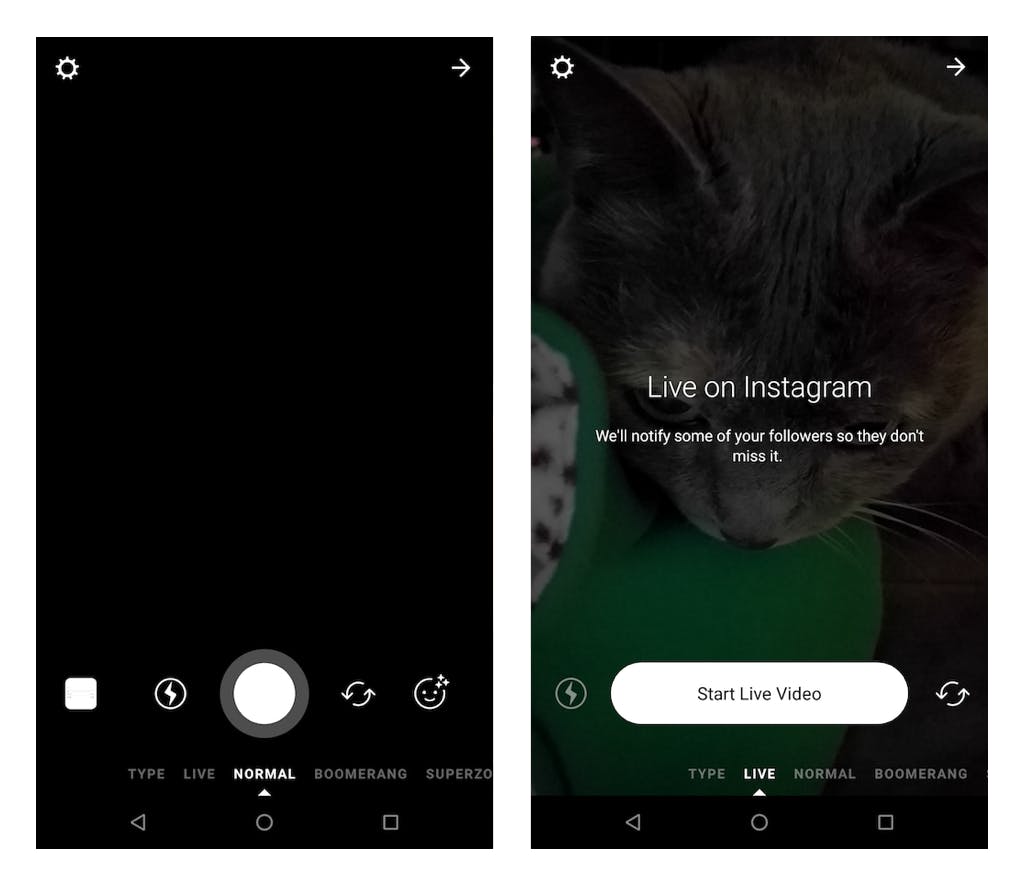
To start a live Instagram video, open Instagram and then either swipe towards the right from your feed or tap the camera icon in the upper lefthand corner. This will take you to the Stories composition section of the app. From there, either swipe towards the right or tap the “Live” option at the bottom of the screen. This take’s you to a landing page for Instagram Live with a large white button for starting your live video stream. (One thing to note: You can swap which camera is enabled, front or rear, by tapping the icon to the right of this button.)
Optional settings for Instagram Live
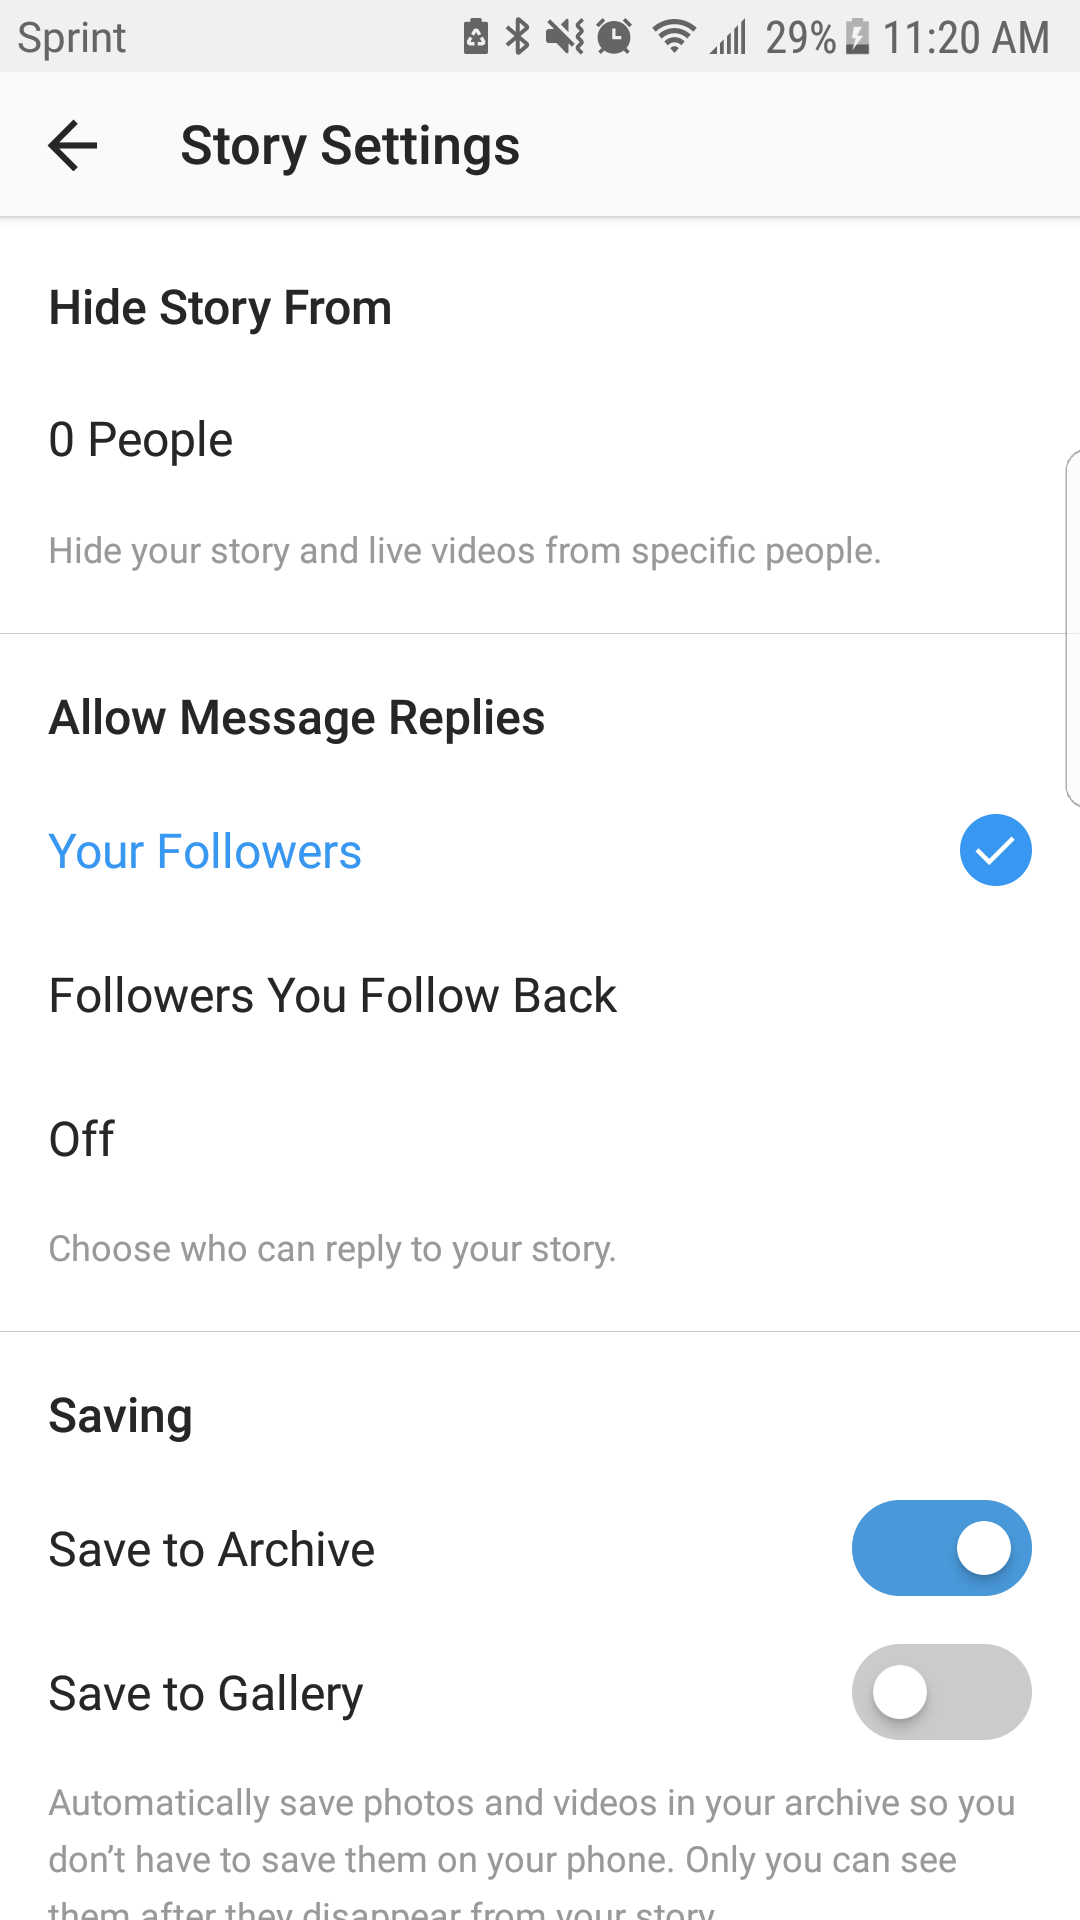
As a default, Instagram will share your stream publicly and allow messages from anyone. You can adjust this by tapping the gear icon in the upper right. Here, you can choose to hide your story from particular Instagram users, as well as limit message replies only to people you follow. (You can also turn message replies off altogether, if you’re only interested in sharing your video and not getting responses from live viewers.)
Instagram also automatically saves photos and videos posted to Stories in your Instagram Archive in the app, and to your handset’s camera roll.
You can also either allow sharing (which lets people share your Story as a message with others) or opt to automatically share your Story to Facebook, too.
READ MORE:
- How to repost on Instagram
- The secret trick to downloading full-resolution Instagram photos
- Who has the most followers on Instagram?
Once you’re live on Instagram
Once you’ve tapped that “Start Live Video” button, the app will start streaming your phone’s video feed. Instagram will also notify some of your followers that you’re live, so you’re (hopefully) not broadcasting to a ghost town. You can tell you’re streaming live by the pink “Live” icon in the upper left. To the right of this is a viewer count, which tells you how many people are currently watching your stream.
Unless you’ve disabled message replies, viewers will be able to comment on your stream. These comments will show up at the bottom of the screen, with the latest comments popping up just above a comment compose field where you can also respond to queries. To the right of this field are a couple other options you might find helpful.
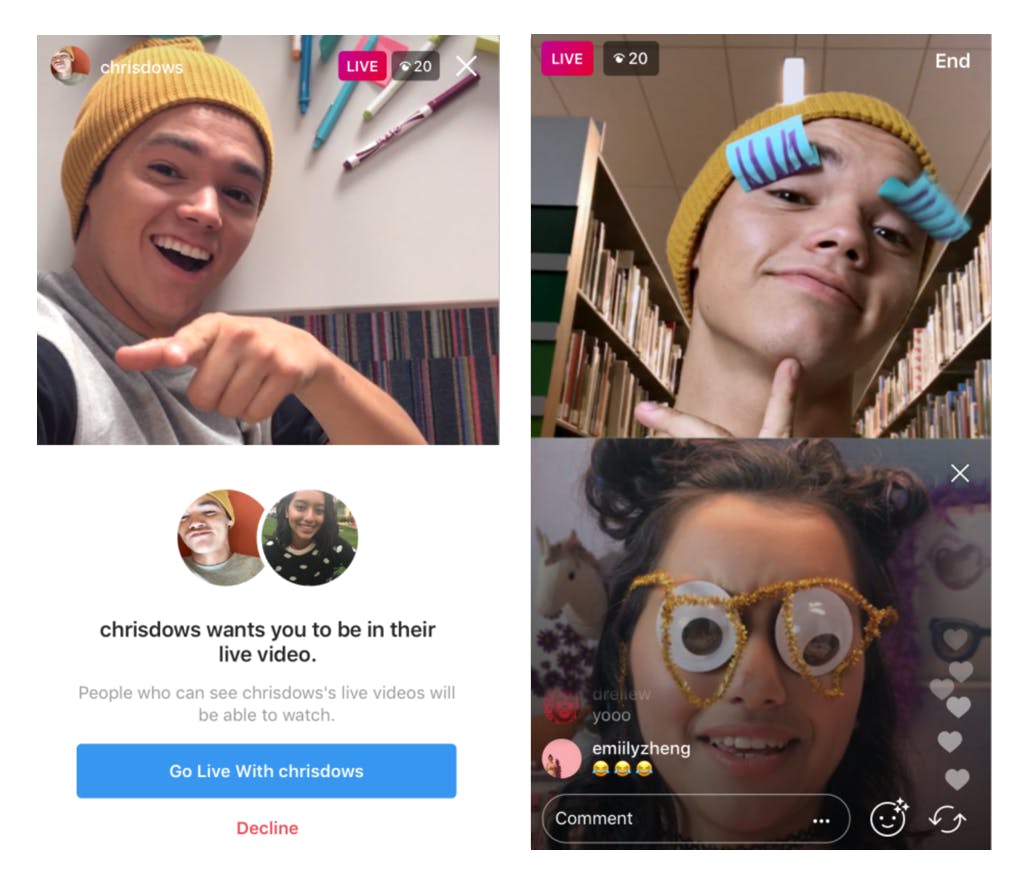
1) Face filters
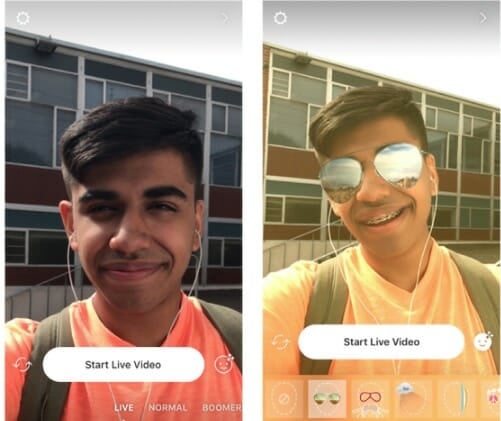
Next to the comment field you’ll find a smiley face icon with three dots. Tap this symbol to pull up Instagram’s library of face filters for Instagram Live. You can play with these filters as much or as little as you would like during the course of your streaming, choosing one for the duration, swapping between different ones to be silly, or not using any at all.
If you’re streaming something serious, or an image where accurate color representation may matter, you’ll likely want to stay away from these face filters. However, if it’s just you chatting casually with the camera—and the followers and friends following along—a face filter may add some personality or pizazz to an otherwise ordinary scene.
2) Add a friend

You also don’t have to go live alone—you can add a friend to Instagram Live. To do this, tap the icon with two smiley faces next to the comment field (at the bottom of the screen). This brings up a menu box with a list of friends you can go live with. When you select someone and then tap the Add button, the screen will be split horizontally, and their stream will show up underneath your own.
A guest can leave at any time, and you can also end their stream—and select another friend to go live with instead, if you choose.
3) See who’s watching
To see who is currently viewing your livestream, tap the eye icon in the upper left. This will show you your Instagram Live follower count.
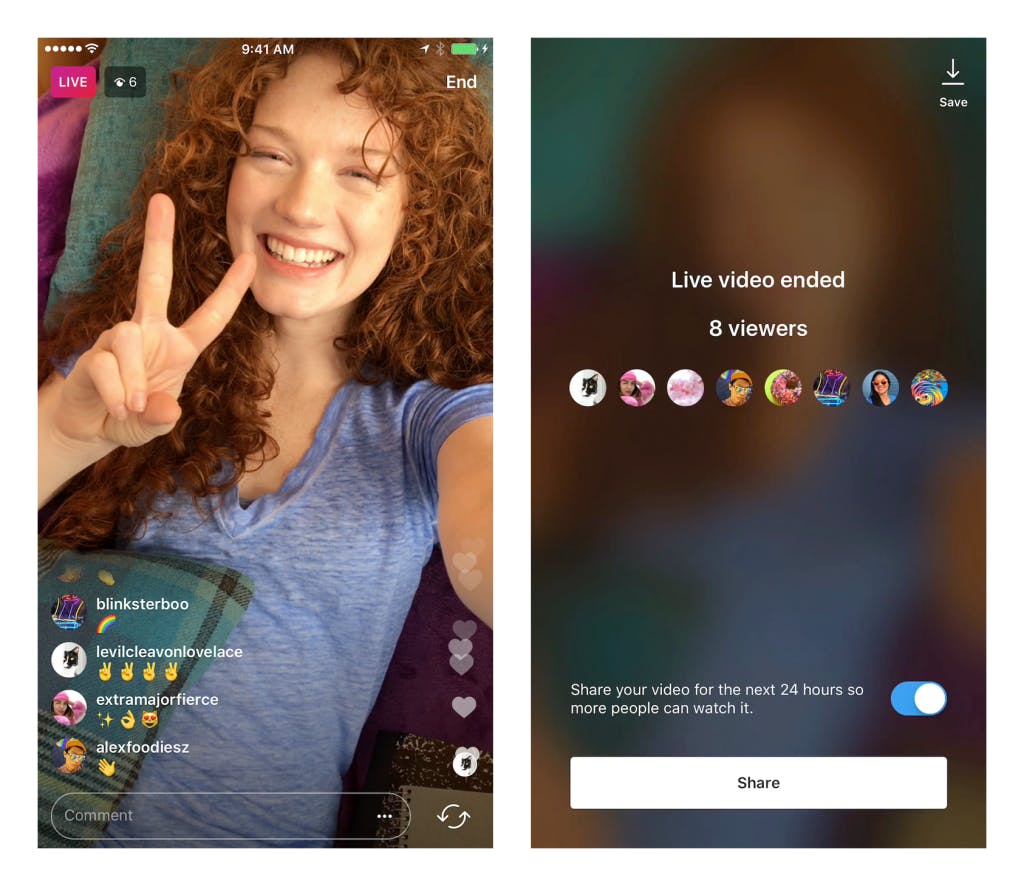
Once you’re done with Instagram Live
Once you’re done with your Instagram livestream, just tap the End button in the upper right corner of your screen. From there, you’ll be taken to a screen that confirms that your live video has ended and tells you the total number of viewers who tuned in (as well as thumbnails of their profile images). In the upper right, you have the option to save your video to your phone’s camera roll. At the bottom of the screen, you can tap to share your live video so that those who weren’t able to watch in real-time can still enjoy it for up to 24 hours after the fact.
How to use Instagram Live: Tips and tricks
Your livestream will go more smoothly if you follow some of these Instagram Live tips.
1) Promote yourself
Got something big you want to share when you go live? Be sure to promote your broadcast with an Instagram post at least a few hours beforehand. You can also drum up hype on other social networks like Facebook and Twitter, too. Be sure to include your Instagram handle, what time you’re going live, and a teaser of what viewers should expect—or why it’s worth their time to tune in.
2) Prepare yourself and your phone
Before you go live, you can try recording a test-video with your phone’s camera first. This will help show you how you’ll appear on camera (do you need to fix your hair or shirt collar?), how your background looks (should you change angles?), how you’ll sound (is there a lot of background or wind noise?), and whether lighting is adequate (or too harsh).
3) Have a plan
While you don’t need a full-on script (although it’s not a bad idea), it’s good to have some idea of what you want to share with your Instagram Live. If you’re showing off a favorite product, a destination, or a dish you made, brush up on some related facts or stats—things you think viewers will be interested in learning. If you’re interviewing someone, jot down a couple questions ahead of time so you don’t blank while recording.
While you’re streaming, be sure to remind followers of who you are and the reason you’re streaming periodically. If you’re going live for only a minute or two, this may not be necessary, but if you’re live streaming an event, for example, a little periodic explanation goes a long way.
4) Give your video a title
Inevitably, folks will watch your live stream who have no context as to what’s going on. You can help them out by giving your video a title. To do this, type a title for your live video in the comments section at the bottom of the screen. Once you’ve shared the comment, you can tap to pin it to the screen.
5) Silence trolls
If someone jumps into the comments and starts saying terrible things, you have the power to silence them. In the list of people viewing your stream, you can tap the X next to their name and then mute their comments.
6) Track your progress
If part of the reason you’re going live is to expand your Instagram presence, you’ll want to monitor your progress. An easy way to do this is to take a screenshot of the screen at the end of your broadcast which tells you how many people viewed your livestream. For easy reference down the line, create a folder in your camera roll where you store these screenshots. There, you can compare your videos over time and see if you’re gaining new followers, or if particular topics or streaming times were more popular than others.
Need more help? Here’s how to post longer videos to Instagram, the easy way to save Instagram videos, and the simple way to add music to your Instagram videos.