The next wave of emoji are here.
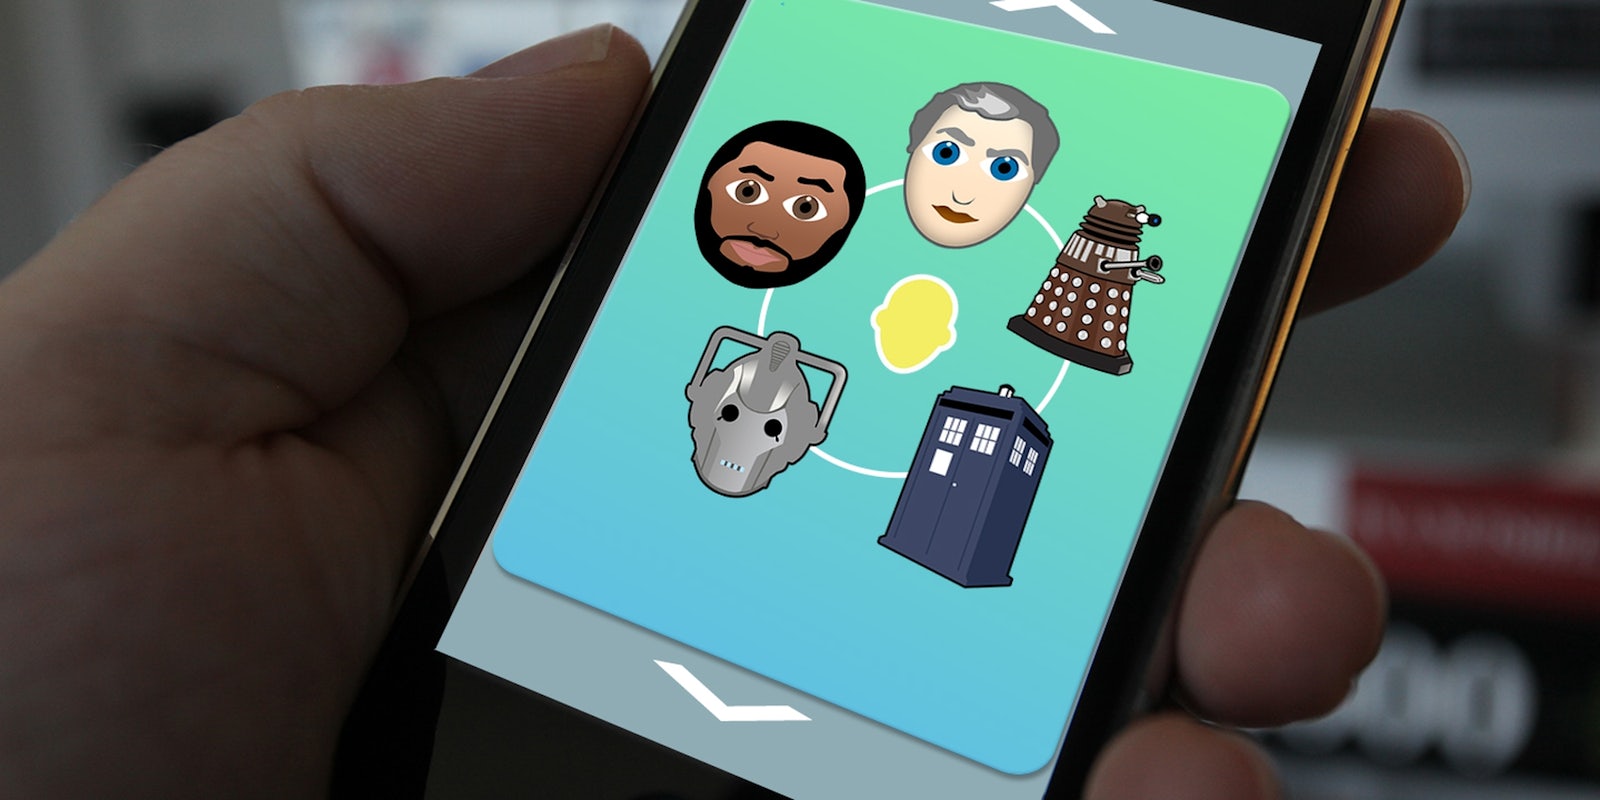
With the limited characters currently available on iPhones, custom emoji have become incredibly popular, including full sets for Game of Thrones, Seinfeld, and Doctor Who. Except, we quickly realized, they came with one giant flaw.
We couldn’t actually use them in real life.
You could share the photos on Twitter and Facebook all you wanted, but they’re useless when it comes to what many of us really want to do: Send an obnoxious amount of them to our friends.
But, alas, there is hope! You can you now use our Whomoji and even make your own characters to suit your deepest wishes on your iPhone or Android phone.
Here’s how:
1) Download imojiapp.
I found imojiapp to be most useful when it came to uploading customizable emoji, and even better, it’s free in the iTunes App Store and on Google Play.
2) Make an account.
Fairly straightforward.
You can either sign up using an email address or linking to Facebook, but you’ll need to create a username and password.
3) Explore a bit.
If the creative juices aren’t flowing, you might as well check out what people have already uploaded through the search feature. You can also make your own by uploading the images. I checked in on an Internet staple, and she is alive and well on imojiapp.
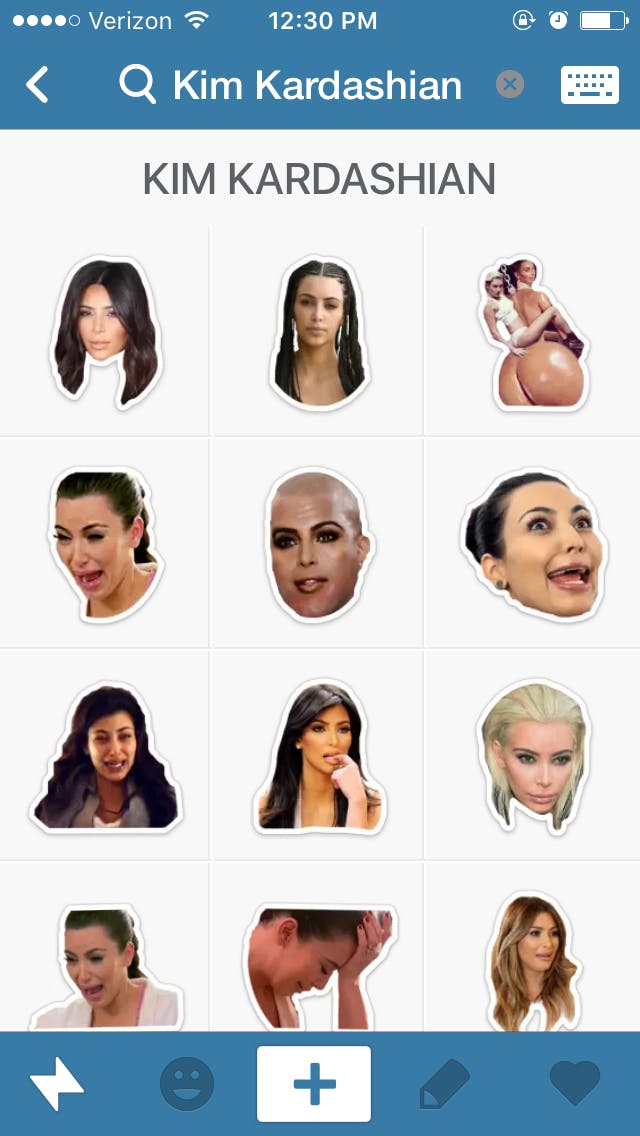
Screengrab via imojiapp
If you’re only planning to use custom emoji and not make any of your own, the search bar is how you find what you need. Get specific, and check your spelling. It works off what people tag. Search “Whomoji” for our Doctor Who emoji, and they should all come up.
4) Start uploading.
Now that you’ve looked around, you’re ready to start creating some emoji of your own. From any page of the app, click the plus sign (it should in the center of the toolbar on the bottom of the screen) where you’ll be prompted to take a photo, find an image, or upload a photo you already have saved.
Once you have your photo, you’ll be asked to crop it by tracing an outline and pushing the emoji’s border. Click the check mark when you’re ready.
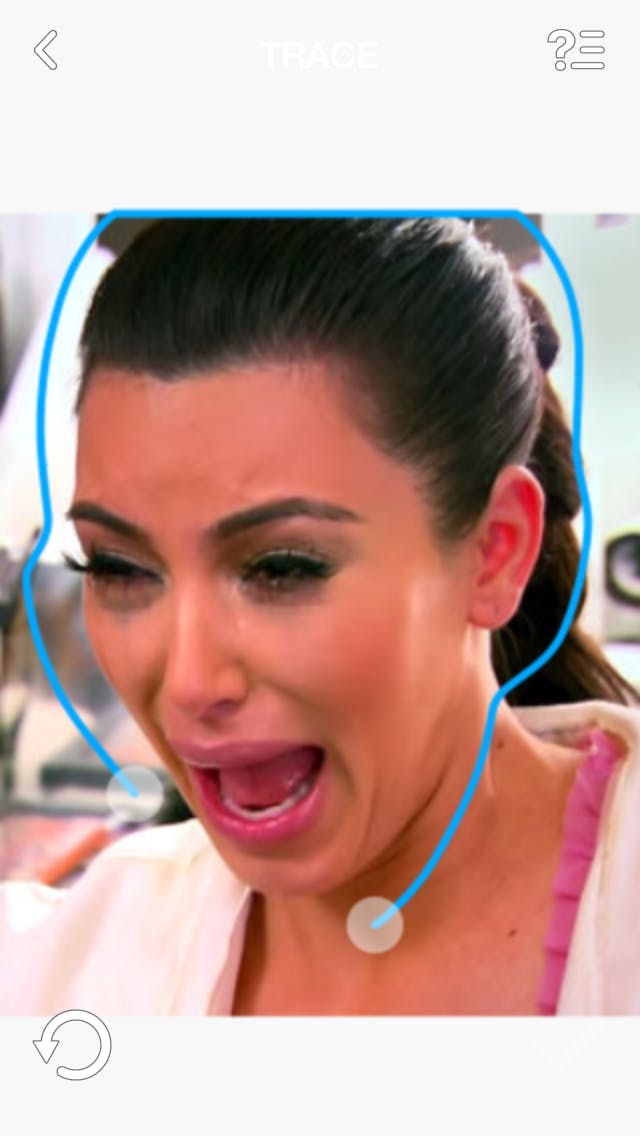
Screengrab via imojiapp

Screengrab via imojiapp
5) Tag your emoji.
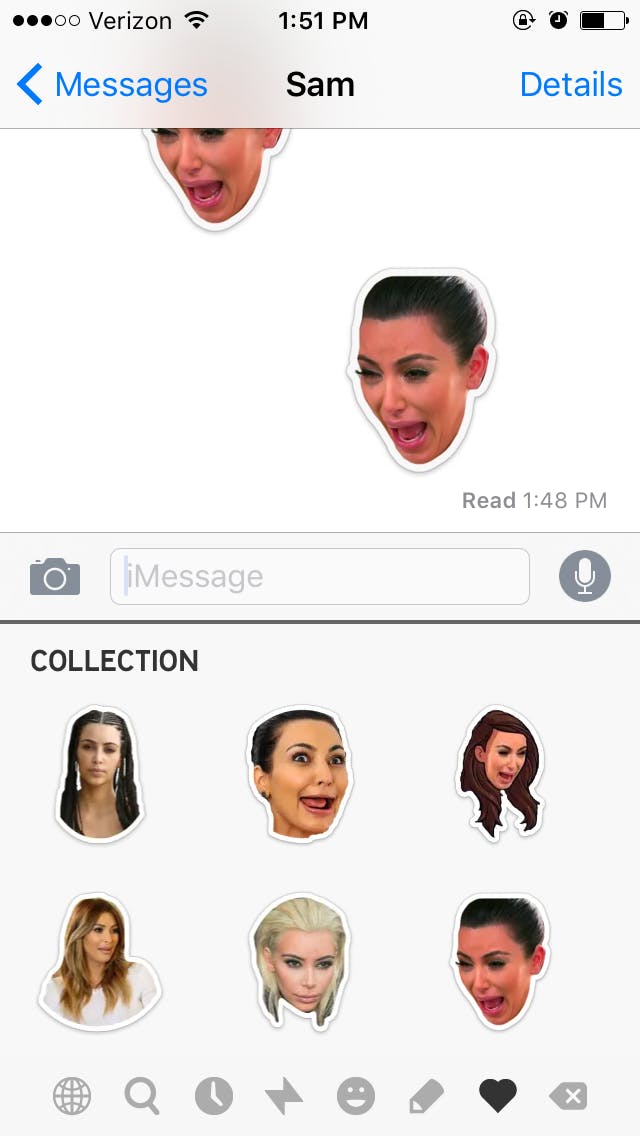
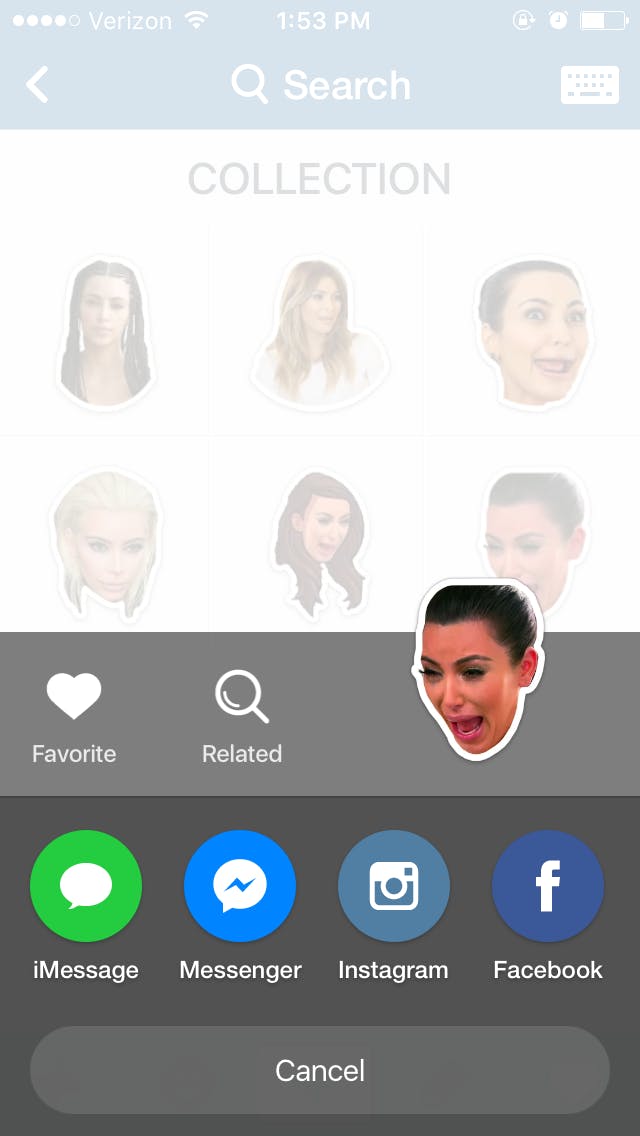
The tags are essential for other people find your emoji, so try to be as specific as you can. For this crying Kim Kardashian, I used “Kim Kardashian,” “Kim K,” “crying,” and “cry reaction” in case people decide to look for it under other search terms.
6) Repeat steps 4 and 5 until you’ve uploaded everything.
The bigger the original image the better it will look when sized down (although it may ultimately create a bigger emoji than you’re used to using). When you upload and crop an emoji, it becomes saved in your collection, where you can view and use them later by tapping on the heart icon on the toolbar.
7) Enable the emoji keyboard on your iPhone or Android.
For easy access to your new emojis, click on the keyboard icon in the top right corner of the app and follow the instructions to enable the imojiapp keyboard on your device.
Screengrab via imojiapp
8) Start sending!
Using the imojiapp keyboard, send your creations with any messaging application by switching to the keyboard, clicking on the emoji to copy it to the clipboard, pasting it into the message field, and sending it as an image.
Screengrab via imojiapp
Alternatively, you can send the emoji through imojiapp to Facebook, Twitter, Instagram, and Messenger. Click on the emoji, select the preferred mode of communication and once you’ve typed in your message, press send.
There you have it. The possibilities are endless.